
During my recent webinar, I showed how our SourcePoint JTAG-based debugger can enhance WinDbg’s power by adding kernel trace capabilities, for both event and instruction trace. Due to lack of time in the webinar, I demonstrated each of these trace types separately. In this article, I show how the timestamps for event and execution trace can be correlated, so you can see all of the code executed leading up to an event.
In my webinar entitled WinDbg JTAG-based debug with DCI and EXDI, I did a demonstration of basic run-control, as well as of the use of Intel Processor Trace (Intel PT) and Architectural Event Trace (AET) as they complement the power of the Windows kernel debugger. Due to limited time, the demonstrations were pretty basic, and each feature was demonstrated separately. But, when it comes to kernel debugging, combining the power of run-control, execution trace and event trace really makes the tools shine. The fact that event trace and execution trace can be correlated with a common timestamp is a game-changer. Having said that, it’s important to understand how to use the two together to deal with sparse events. Consider this article to be an advanced tutorial on correlating events with code using SourcePoint WinDbg.
To start off with, I’ll highlight that modern Intel CPUs support two main types of instruction trace that will be emphasized here: Last Branch Record (LBR), and Intel Processor Trace (Intel PT). LBR uses dedicated MSRs to capture the to-from instruction pointer addresses upon each code branch, so this facility can be used directly from the reset vector. Due to a limited number of MSRs available (depending on the CPU), you can capture 200-300 assembly language instructions with LBR, based on how many branches are taken in the code. That’s not a lot, but it can be a huge advantage compared to having no idea what code executed before an event was captured.
Intel PT can capture essentially an unlimited amount of execution trace, constrained only by the amount of system memory available on the target. Intel PT does capture execution trace data in a very compacted form, and since it depends on system memory availability, cannot be used prior to the memory being initialized. However, for Windows debugging, RAM is already available, so this isn’t a problem.
For event trace, the most powerful utility is AET. You can read a lot more about it in various articles I’ve written over time: as for example, Advanced Capabilities of Architectural Event Trace; and in the in-depth webinar, UEFI Debug with Intel Architectural Event Trace.
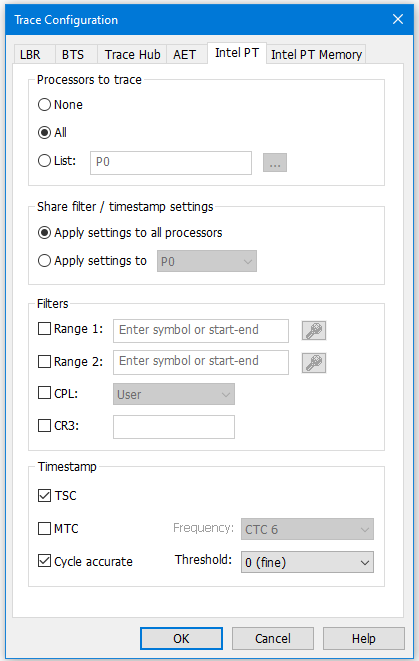
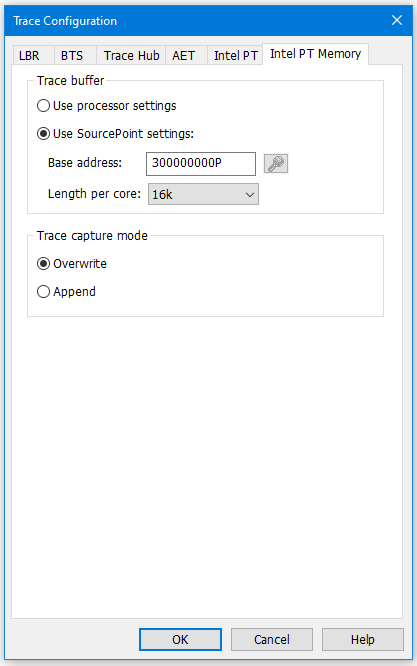
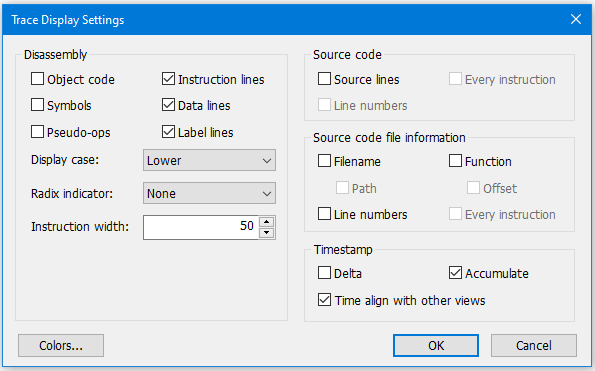
To get a sense of the capabilities and options associated with each of these trace features, it’s worthwhile looking at the Configuration dialog boxes associated with each:
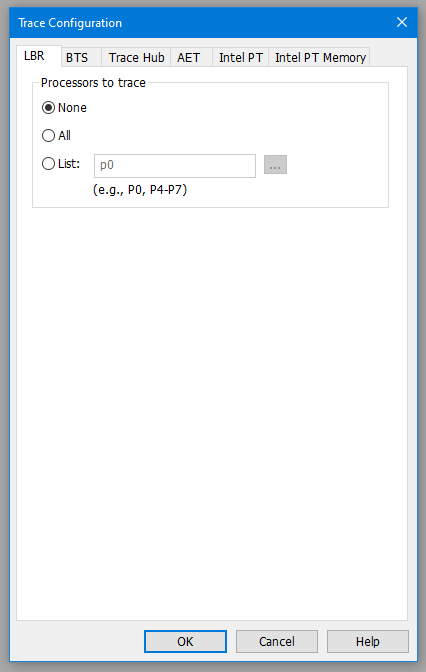
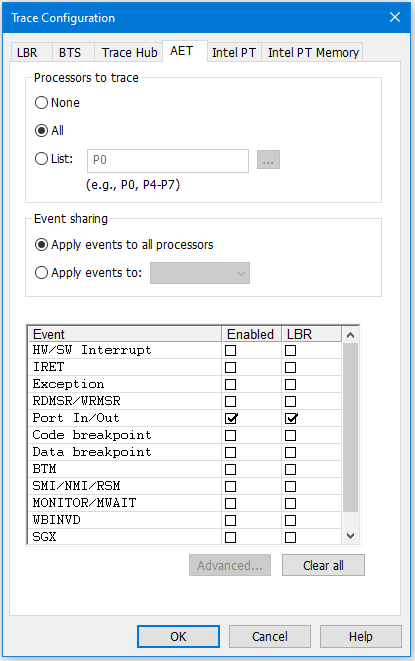
If you look carefully at the different Events that can be captured by AET above, you’ll see that LBR is an option associated with each event. This is extremely useful, as sometimes it is not easy to capture the instruction trace associated with sparse events; we’ll see this shortly.
To understand the use of each of the individual trace features, I’d recommend watching the webinar. For now, let’s look at the combination of Intel PT and AET for debugging Windows events. To set up each of these utilities, follow for example the instructions in the SourcePoint WinDbg Getting Started Guide in the SourcePoint Academy. For the purposes of this article, we will set up AET to capture all Port IN and OUT instructions, the LBR trace associated with them, and the full Intel PT capture. To do this with SourcePoint, just use the settings as highlighted in the images above.
NOTE: You must select “Time align with other views” in the Trace Display configuration dialog box to make sure the timestamps are aligned between the different trace sources:
At the Windows login screen, do a Go in WinDbg, and then issue a Break. You should see the WinDbg Disassembly window as below, and the two SourcePoint trace windows refresh with something like this:
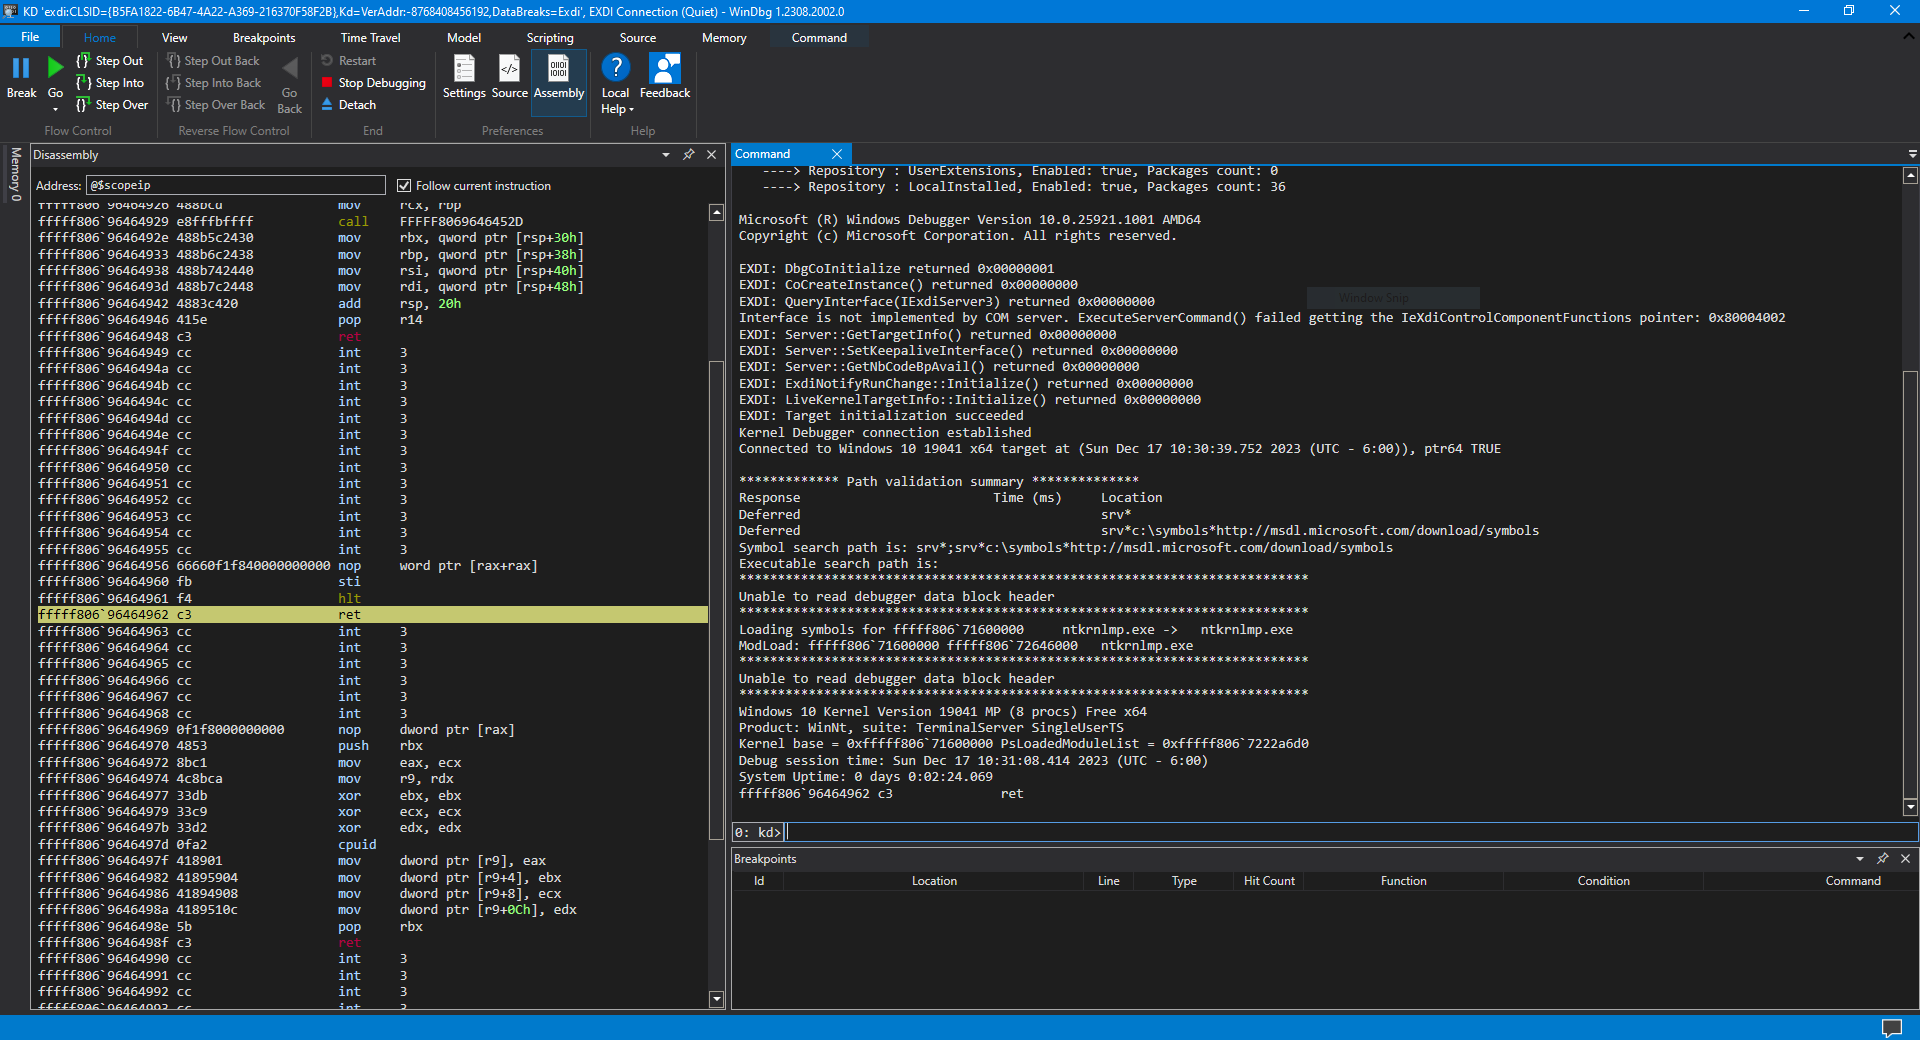
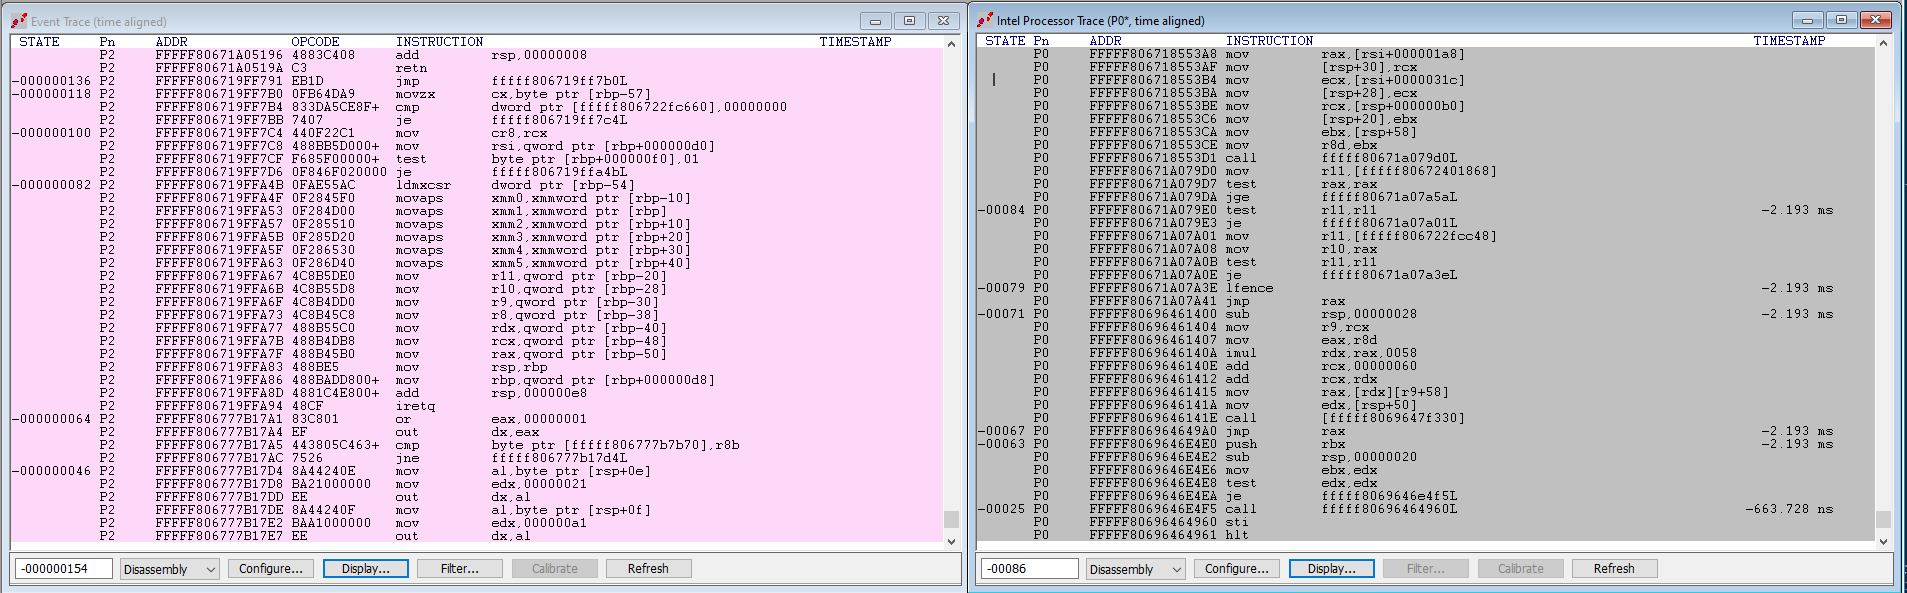
On the right hand side, you see the SourcePoint GUI Intel PT window. As expected, the last three instructions executed by P0 – HLT, STI, and CALL FFFFF80696464960L – are exactly as mirrored in the WinDbg. The HLT is essentially as 0 nanoseconds. Note that the STATE and TIMESTAMP headers at the top of the window are aligned; this is because a single Intel PT “packet” is related to a STATE, and the packet itself is provided with a timestamp. So, in this instance, STATE -00025 has a timestamp of -663.728ns (relatively to 0ns at the baseline) and it captured three instructions in that packet, the HLT, STI and CALL.
Note that the prior Intel PT packet is designated with STATE -00063, has a TIMESTAMP OF -2.193ms, and has five instructions, JE, TEST, MOV, SUB and PUSH. And so on.
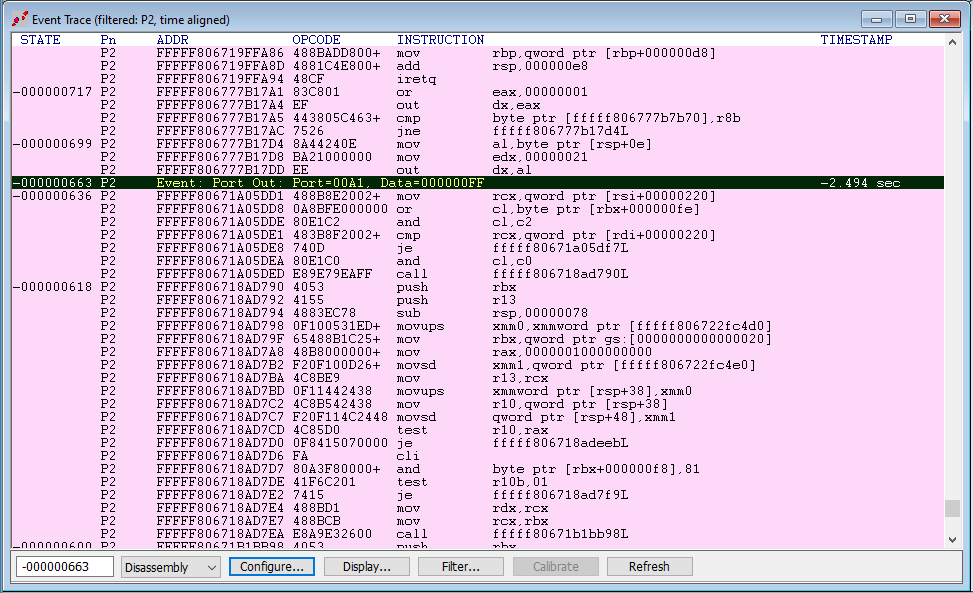
On the left hand side is the SourcePoint GUI Event Trace window. Starting at the bottom is the last OUT event that was captured. And the code, working backwards, is the instruction trace that preceded the OUT instruction. If you scroll backwards in the Event Trace window, you see the actual event called out, the OUT with Port=A1 and Data=FF.
Note that the TIMESTAMP at that first event is -2.494 seconds. This is a long time by Intel Processor Trace standards. In our terminology, the AET data for Port I/O is “sparse” – that is, you would need to capture at least 2.494 seconds of Intel PT data before you would see this particular OUT. That is way too much to try to capture with a 16kB Intel PT buffer. So, in this instance, LBR is of very much more value than Intel PT. Use a bigger buffer for Intel PT to get around this, like 1MB or more. Just be forewarned that the amount of time necessary for SourcePoint to update the Intel PT window will increase significantly; be patient as the houglass icon shows up. Watch the Dashboard Lights (also known as Communications Status Indicator Lights) in the Status Bar at the bottom of the screen as the JTAG memory reads are being performed.
Clever readers will have noted that the OUT event was captured on P2, whereas the Intel PT capture is on P0. That certainly makes sense. To get real alignment of the two windows, right-click in the Intel PT window, click on Viewpoint, and select P2. Also, again in the Intel PT window, select the last instruction, right-click, and select “Zero Timestamp”. Then, the two windows will look something like this:
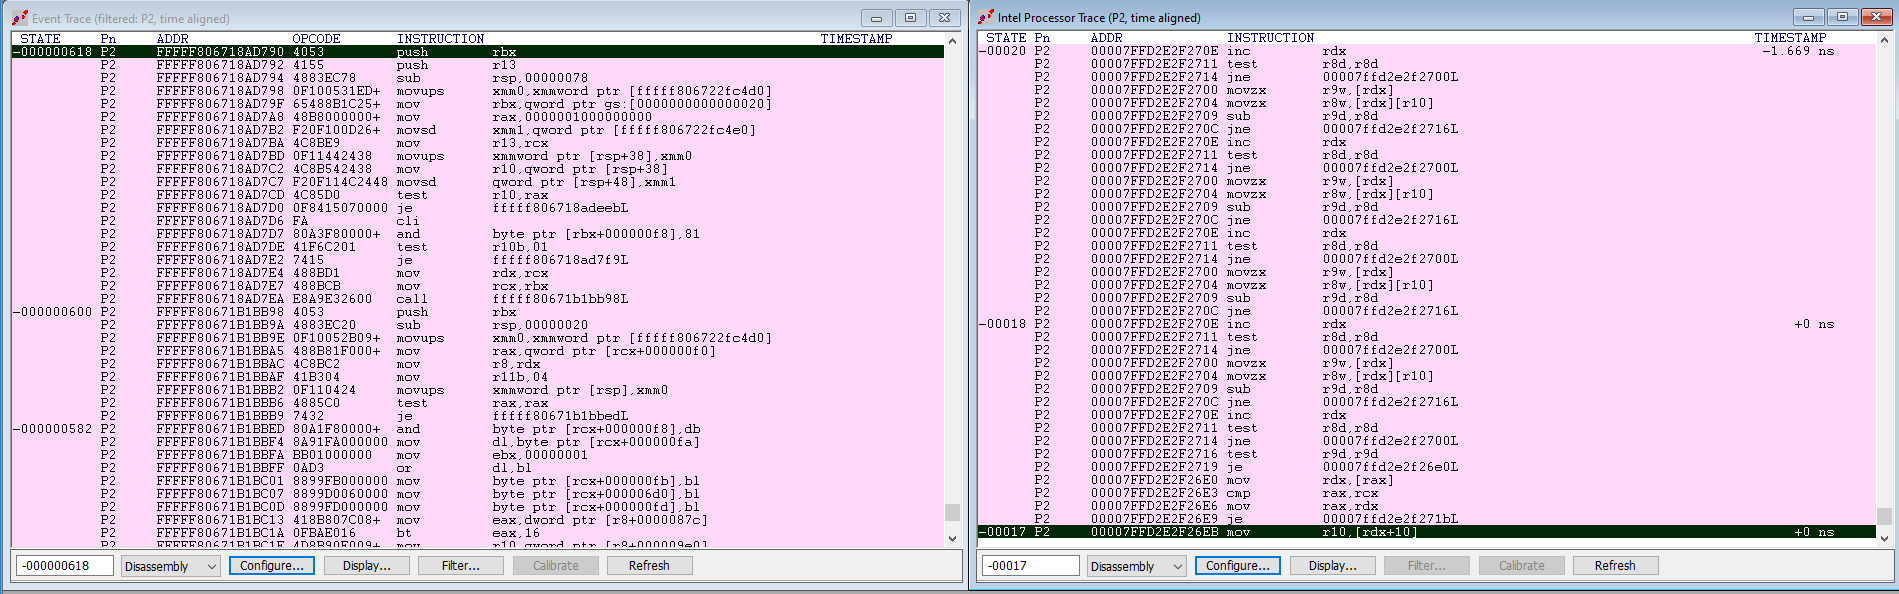
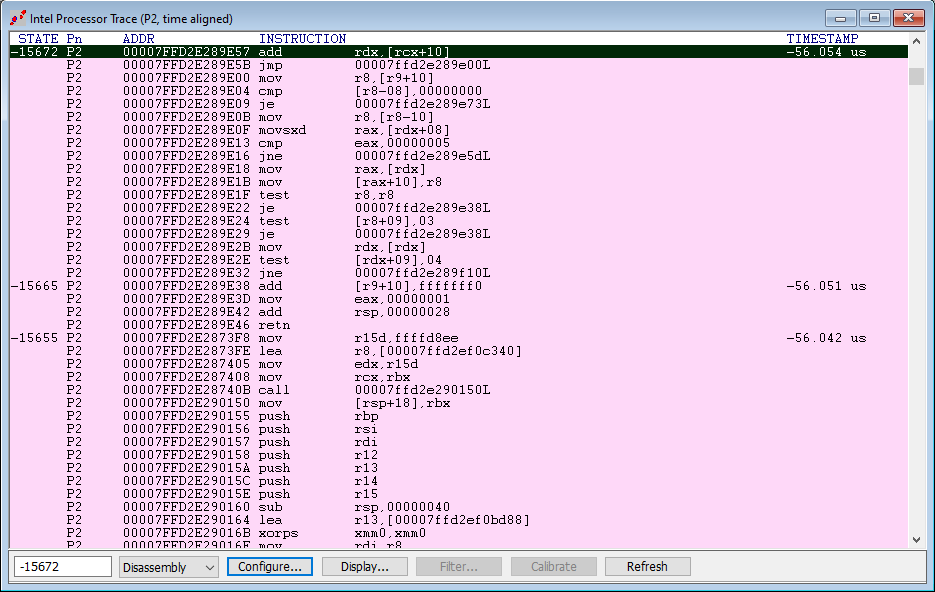
Scroll to the top of the Intel Processor Trace window, and you’ll see the amount of Intel PT data we captured, 56 microseconds:
Then mouse over to the Event Trace window again, and look at the timestamp associated with the first event:
OK, at 2.494 seconds, this is way past the amount of Intel PT data that we captured, as we have seen. You’ll need a bigger Intel PT memory buffer to capture the real code execution for that event.
Hopefully this has been a helpful tutorial on correlating AET with Intel PT. If you want to know more, check out the SourcePoint Academy.