
In my last blog, I wrote about the integration of our SourcePoint JTAG-based debugger with WinDbg, using the Microsoft EXDI interface. We’re almost ready to go to production availability, and here’s an example of combining WinDbg’s OS-aware debug capabilities with SourcePoint’s support for Intel Processor Trace (PT).
In WinDbg integration with SourcePoint using EXDI over DCI/JTAG, I described our prototype development where WinDbg uses the Microsoft EXDI interface to connect with SourcePoint, which in turn connects to the AAEON UP Xtreme i11 Tiger Lake board over the Intel Direct Connect Interface (DCI). We’ve polished up some of the bugs in the early prototype, and the software is almost ready for final release. As a run-up to that, I’m going to describe some of the game-changing benefits of using the two applications together.
Let’s start with SourcePoint’s support for Intel PT. As you may know, Intel PT is a capability available within all modern Intel CPUs, that captures instruction trace once system memory has been initialized. Up to now, SourcePoint has supported Intel PT mostly within the context of UEFI debug. And WinDbg has limited trace capabilities (there’s Time Travel Debug (TTD), but that’s most useful within user mode). With SourcePoint working hand-in-hand with WinDbg, we can capture execution trace for all kernel mode activity, with symbols. Let’s see what that looks like.
Once the EXDI connection has been made to the target, and you do the initial break within WinDbg, you can load symbols into both applications. Here’s what the WinDbg and SourcePoint screens look like:
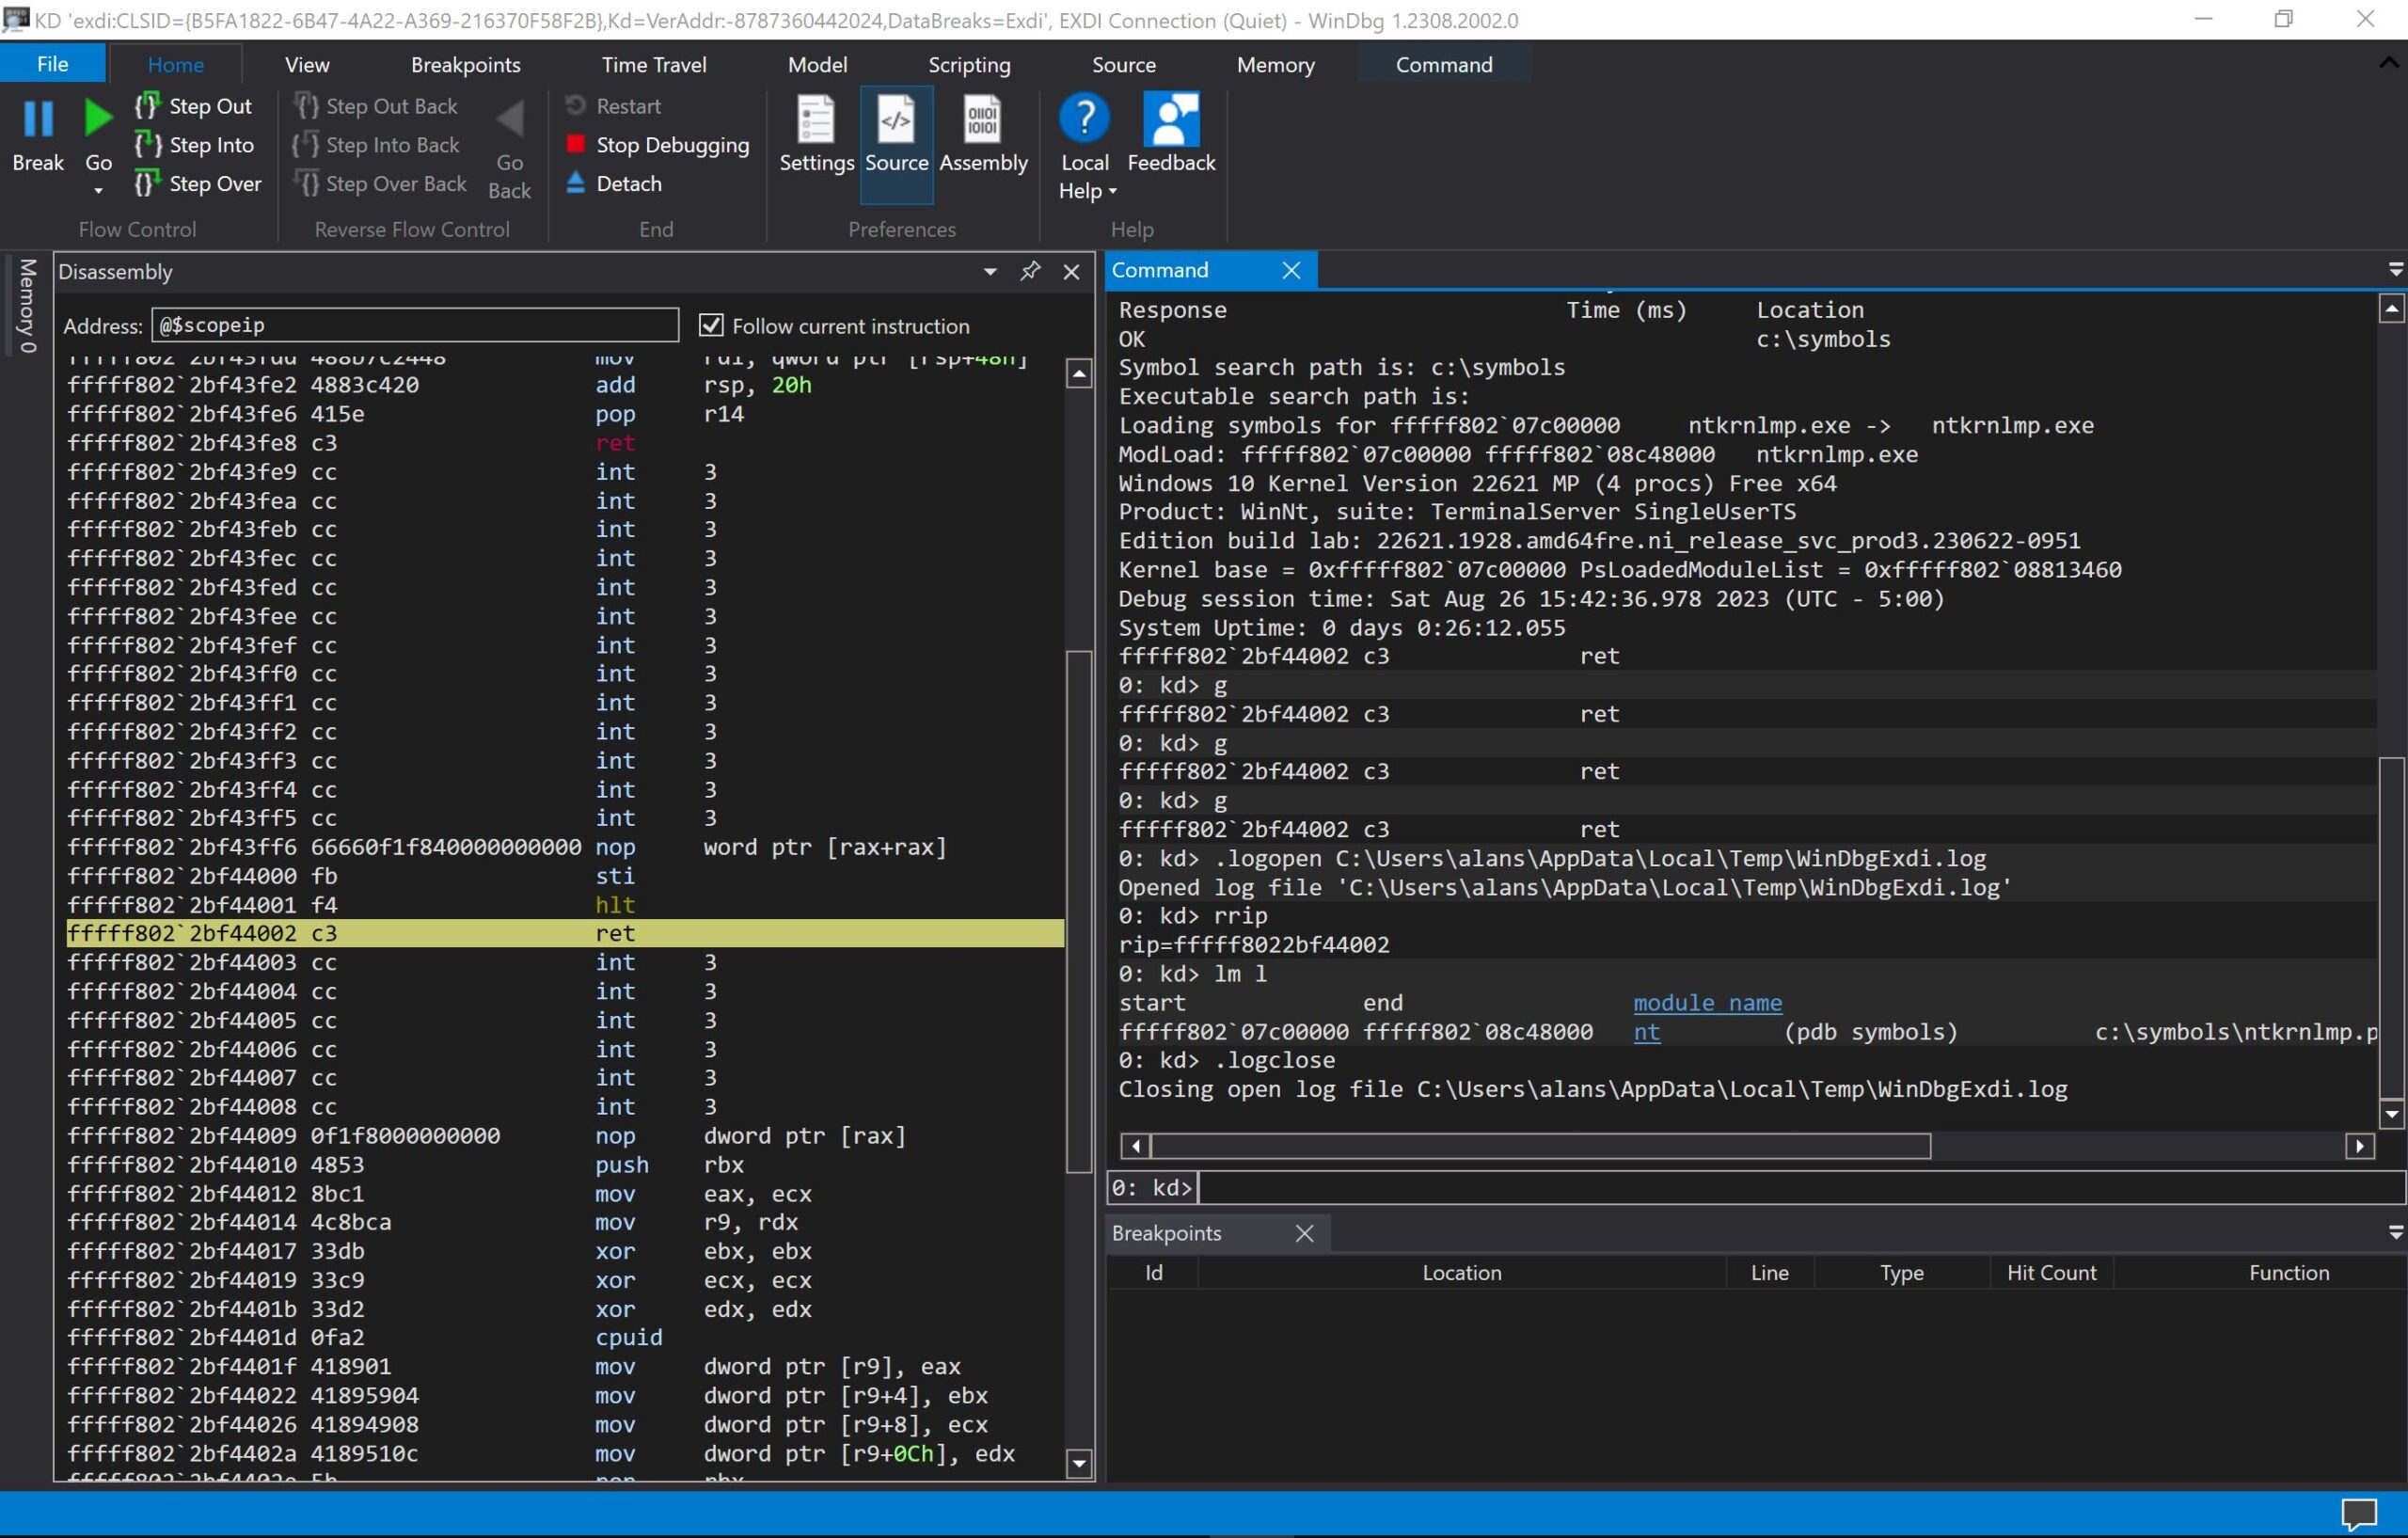

An autonomous break (clicking on the Break button in WinDbg) always lands at the HLT/RET instructions as you see above. Note that this is different from the normal kdnet break that normally lands at nt!DbgBreakPointWithStatus.
You can see that the WinDbg Disassembly window, and the SourcePoint Code window, display the same information.
When the symbols load into SourcePoint, the Symbols window is automatically populated with all symbols in memory. What you see above is a tiny subset of the symbols available; there’s lots of opportunity for scrolling. This is pretty cool. You can right-click on a symbol and open its context menu that provides ability to:
- Open a Code window
- Open a Memory window
- Set a breakpoint
- Display names/types/values/return types (where available)
- Show function properties
For more information, look in our SourcePoint Academy online help on Symbols.
As a next step, I then set a breakpoint at the entry point to the function MmCreateProcessAddressSpace, using the WinDbg command:
bu nt!MmCreateProcessAddressSpace
A lot of times, the target just halts right away. Sometimes, you need to move the mouse around, or open a window, and the first break typically hits on thread 0. The WinDbg and SourcePoint screens look like this:

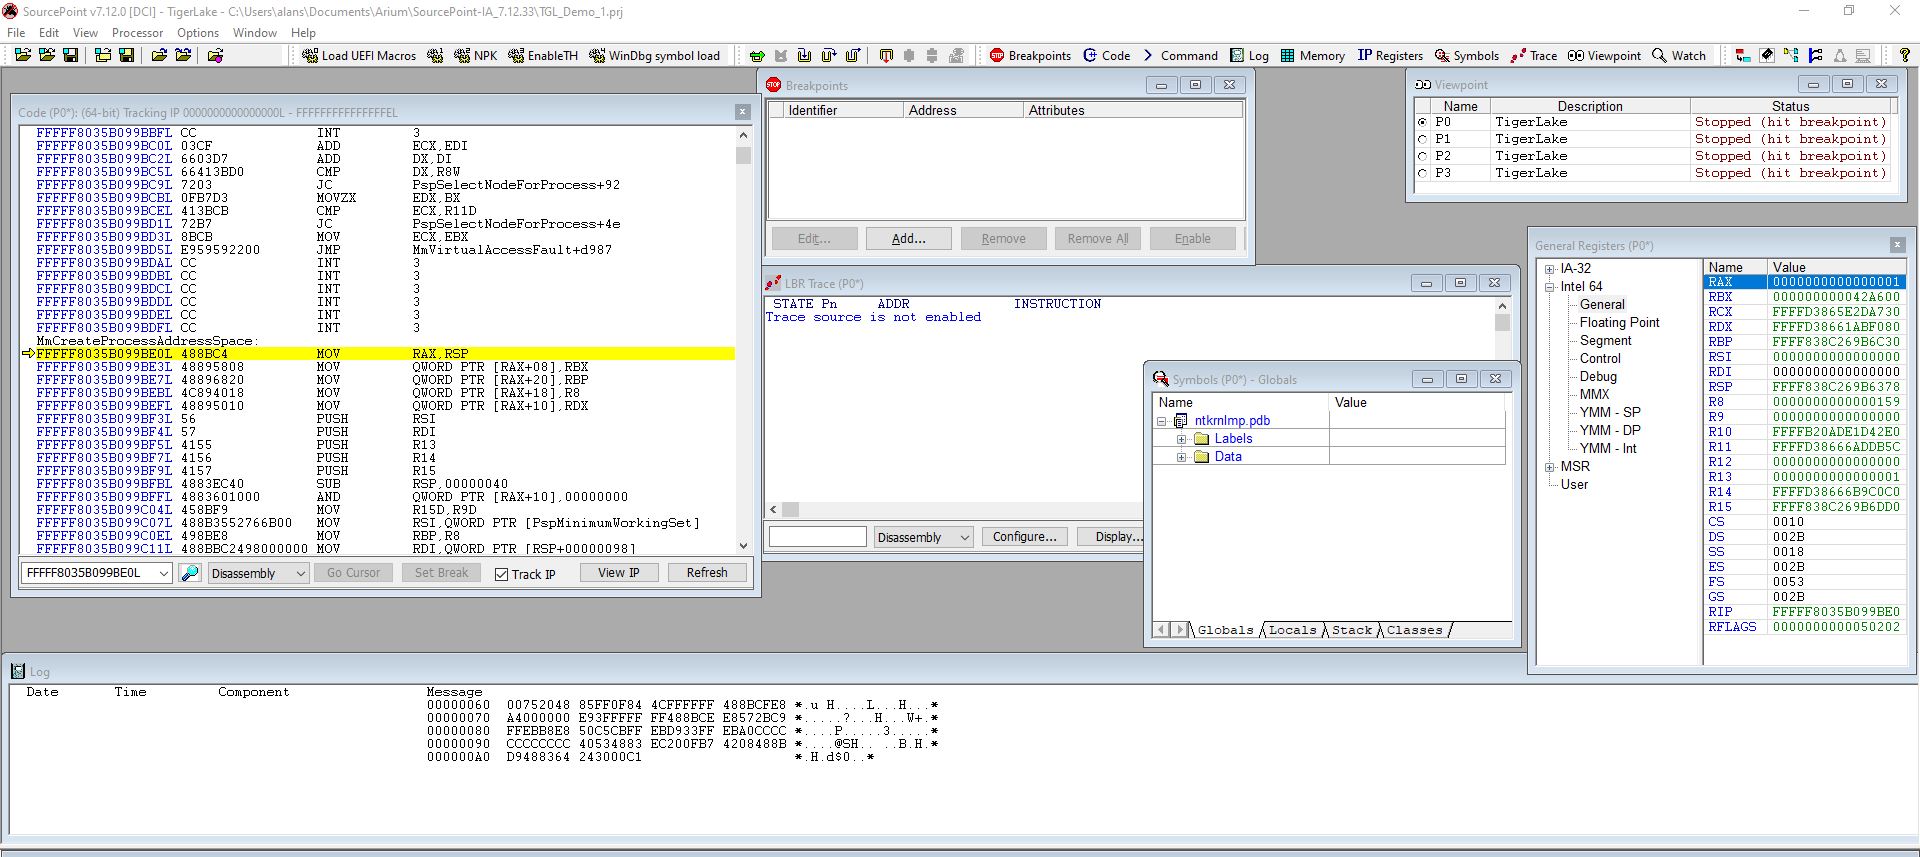
The Disassembly and Code window displays are the same, with the exception of the instruction at fffff803’5b099bd5, which shows in WinDbg:
jmp ntkrnlmp!PspSelectNodeForProcess+0x2259f7
versus in SourcePoint:
JMP MmVirtualAddressFault+d987
Interesting, huh? I wonder which one is correct. 😊
Things get even more interesting when we turn on Intel PT. A traceback at the normal user-initiated break within WinDbg shows in SourcePoint:
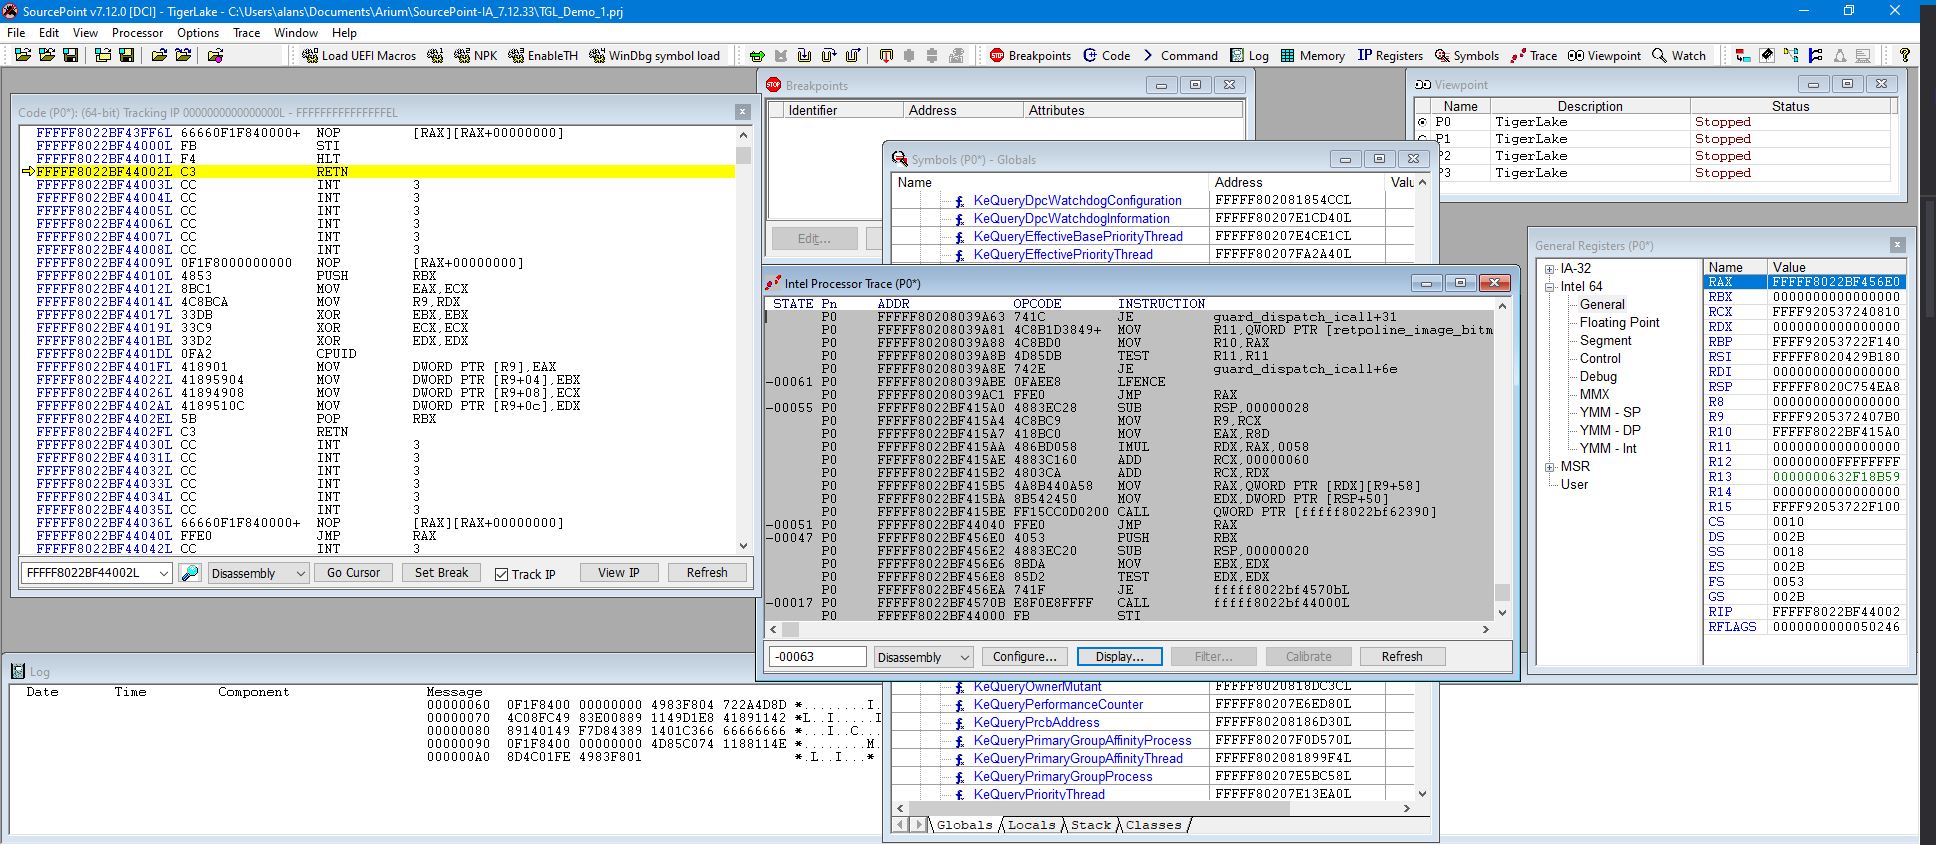
There’s an interesting MOV instruction involving retpoline_image_bitmap bookended by two JE guard_dispatch_icall instructions. I’d like to investigate this further, at a later time.
Again setting a breakpoint at nt!MmCreateProcessAddressSpace, and turning on SourcePoint’s Call Chart capability within Intel Processor Trace, we see the following when we hit the break:
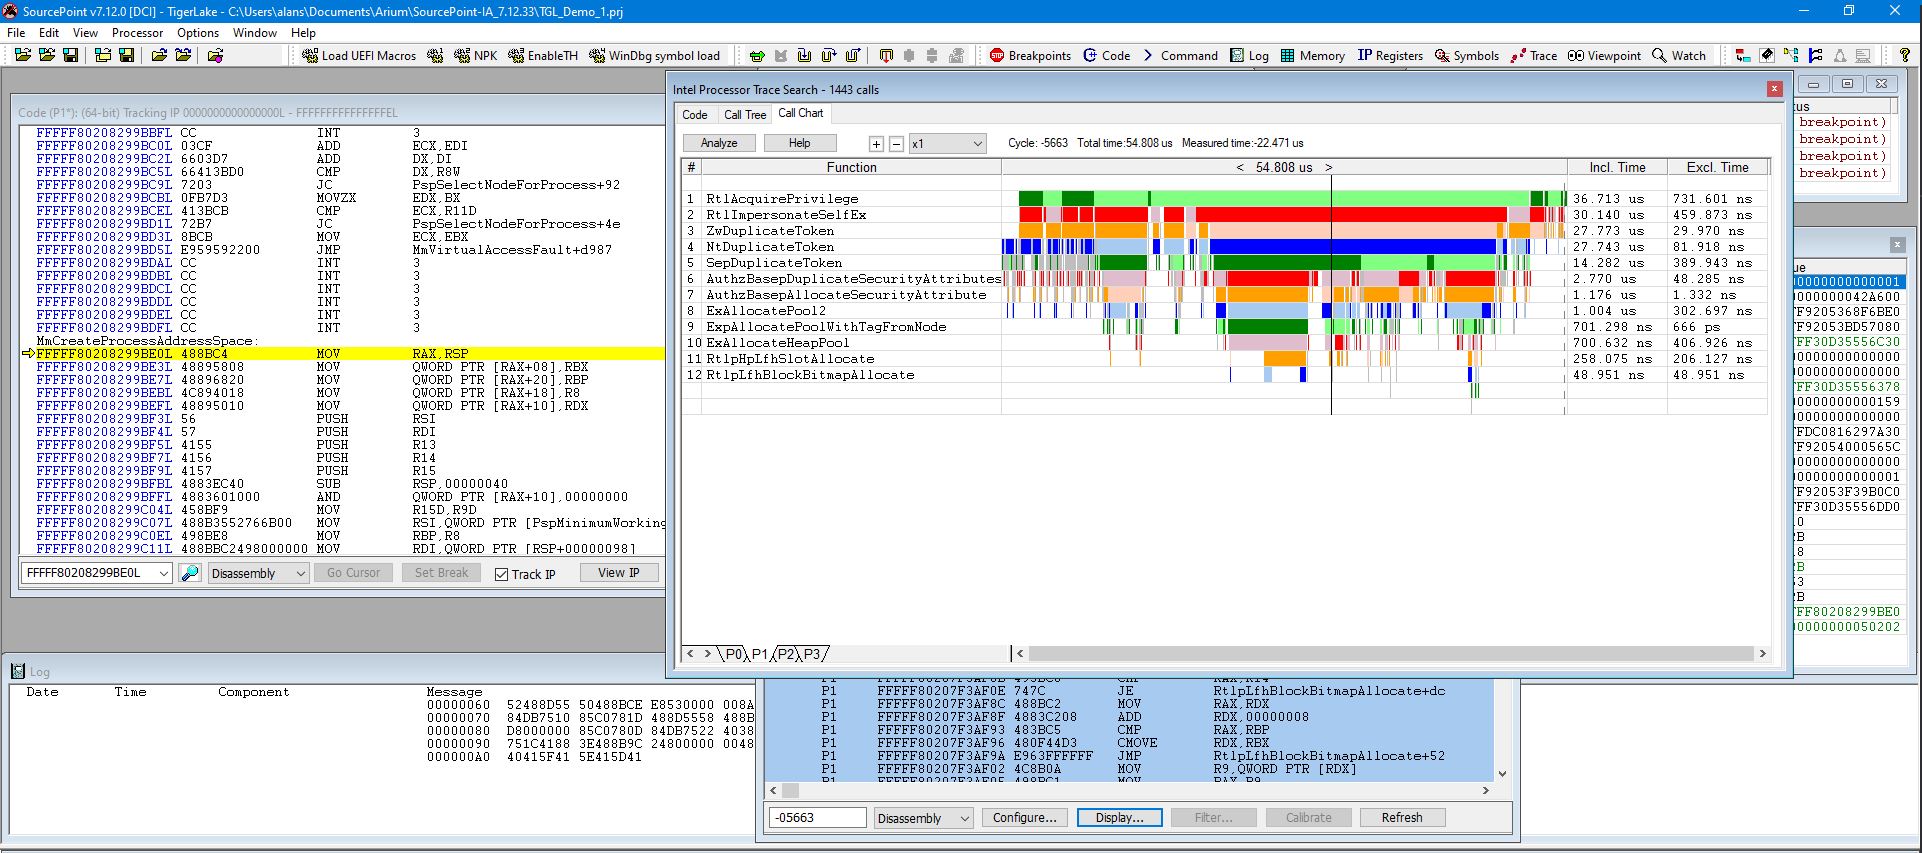
You can see that we captured 54.808 microseconds of trace data, and this was using a 16kB trace buffer within system memory. We can set a larger buffer – up to 2GB – but that would take a long time for SourcePoint to download, process and display that much trace data. But it could be extremely useful to capture a very intermittent issue.
The vertical black line is the time marker within the Trace Search window. You can move it back and forth in time. You can also expand the scale, which is x1 in the above, to zero in on a specific part of the code flow, as per a couple of examples using x128 in the below:
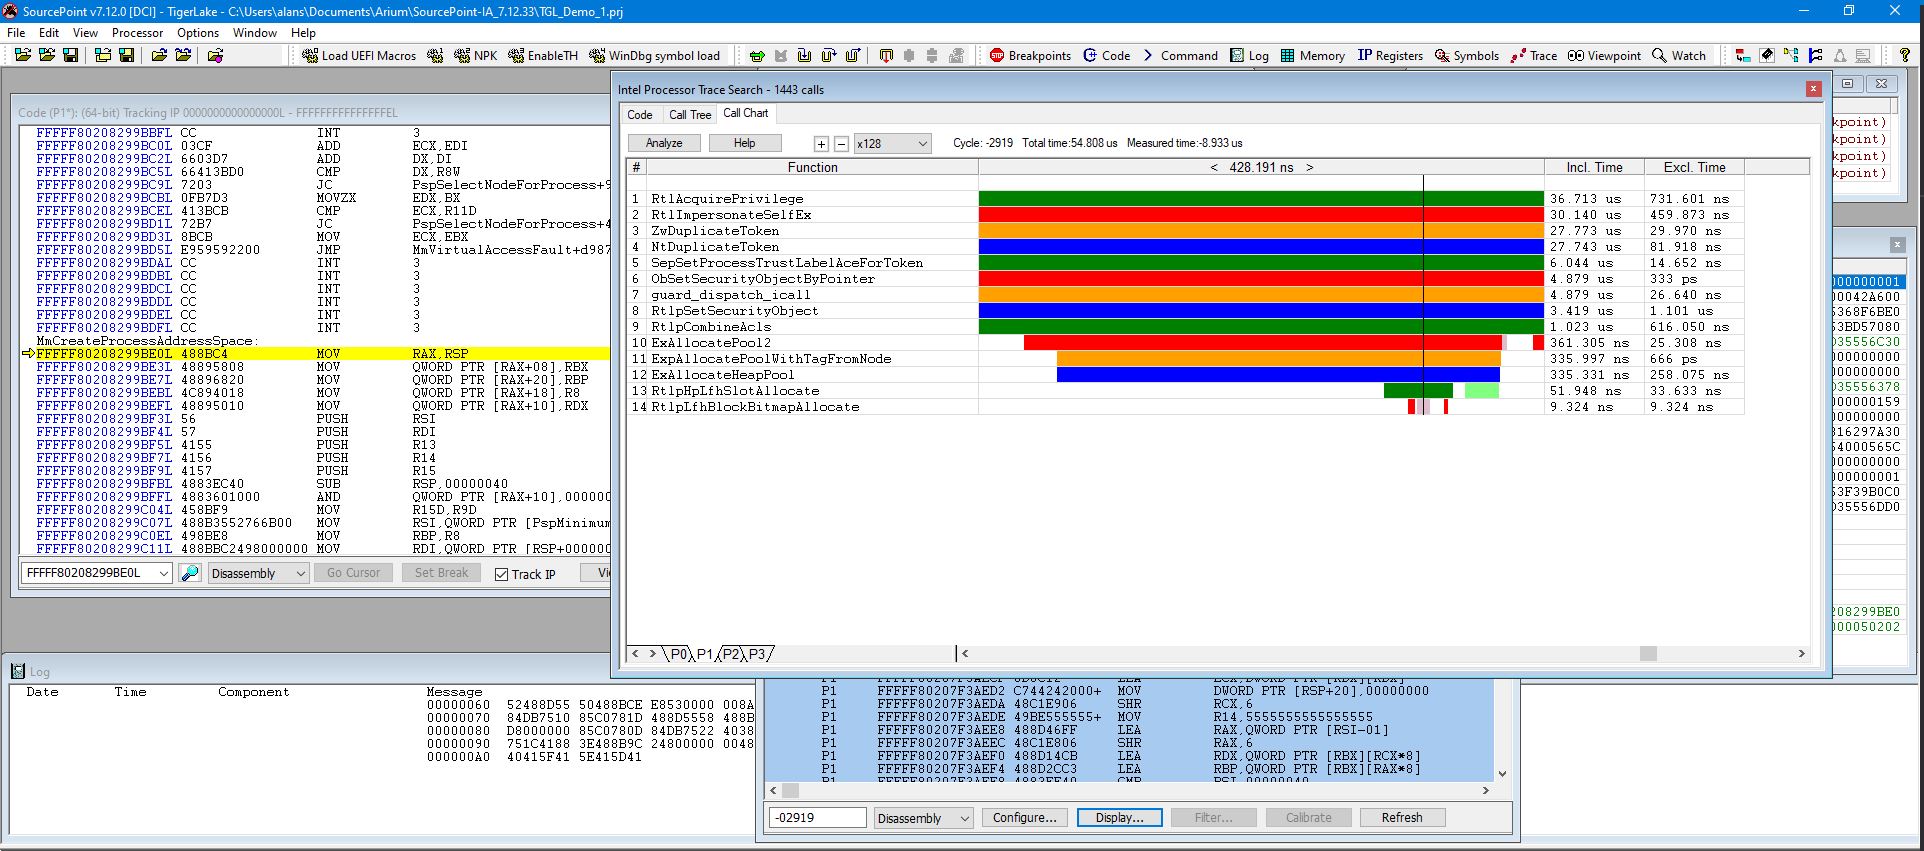

All the trace windows are timestamped and linked with each other. You can click around in any of the trace windows, and the windows dependent on it will automatically update. For example, in the Intel PT window, click on a line of code, and the time marker in the Call Chart window will automatically move. Right-click, and open a separate Tracking Code window to look at the function and line of code of interest:
![]()
This is just the beginning. I’ll cover using Intel PT and Architectural Event Trace (AET) together with WinDbg in my next blog.