
Our SourcePoint JTAG-based debugger has support for a very powerful command language. Much of what can be accomplished via the GUI can also be done programmatically, automating many routine debug tasks. This tutorial covers the basics of taking advantage of this powerful utility.
Many SourcePoint users get by simply by using the interactive GUI. For many applications, this is more than sufficient; and there’s so much functionality in the GUI itself, that there’s no need to go beyond that. But to graduate to “power user” status, and to take advantage of a lot of the horsepower under the hood, it helps to learn the command language, and use it via the command line and via macros.
What is the command language? Simply put, it’s a programming language very similar to ‘C’, with additional commands added for run control, target access, and everything unique to the SourcePoint environment.
Commands can be typed one at a time in the Command window, chained together on the command line, or multiple commands can be executed via a macro file.
Before we do the deep dive, let’s just look at some context. Below is the standard SourcePoint main screen:
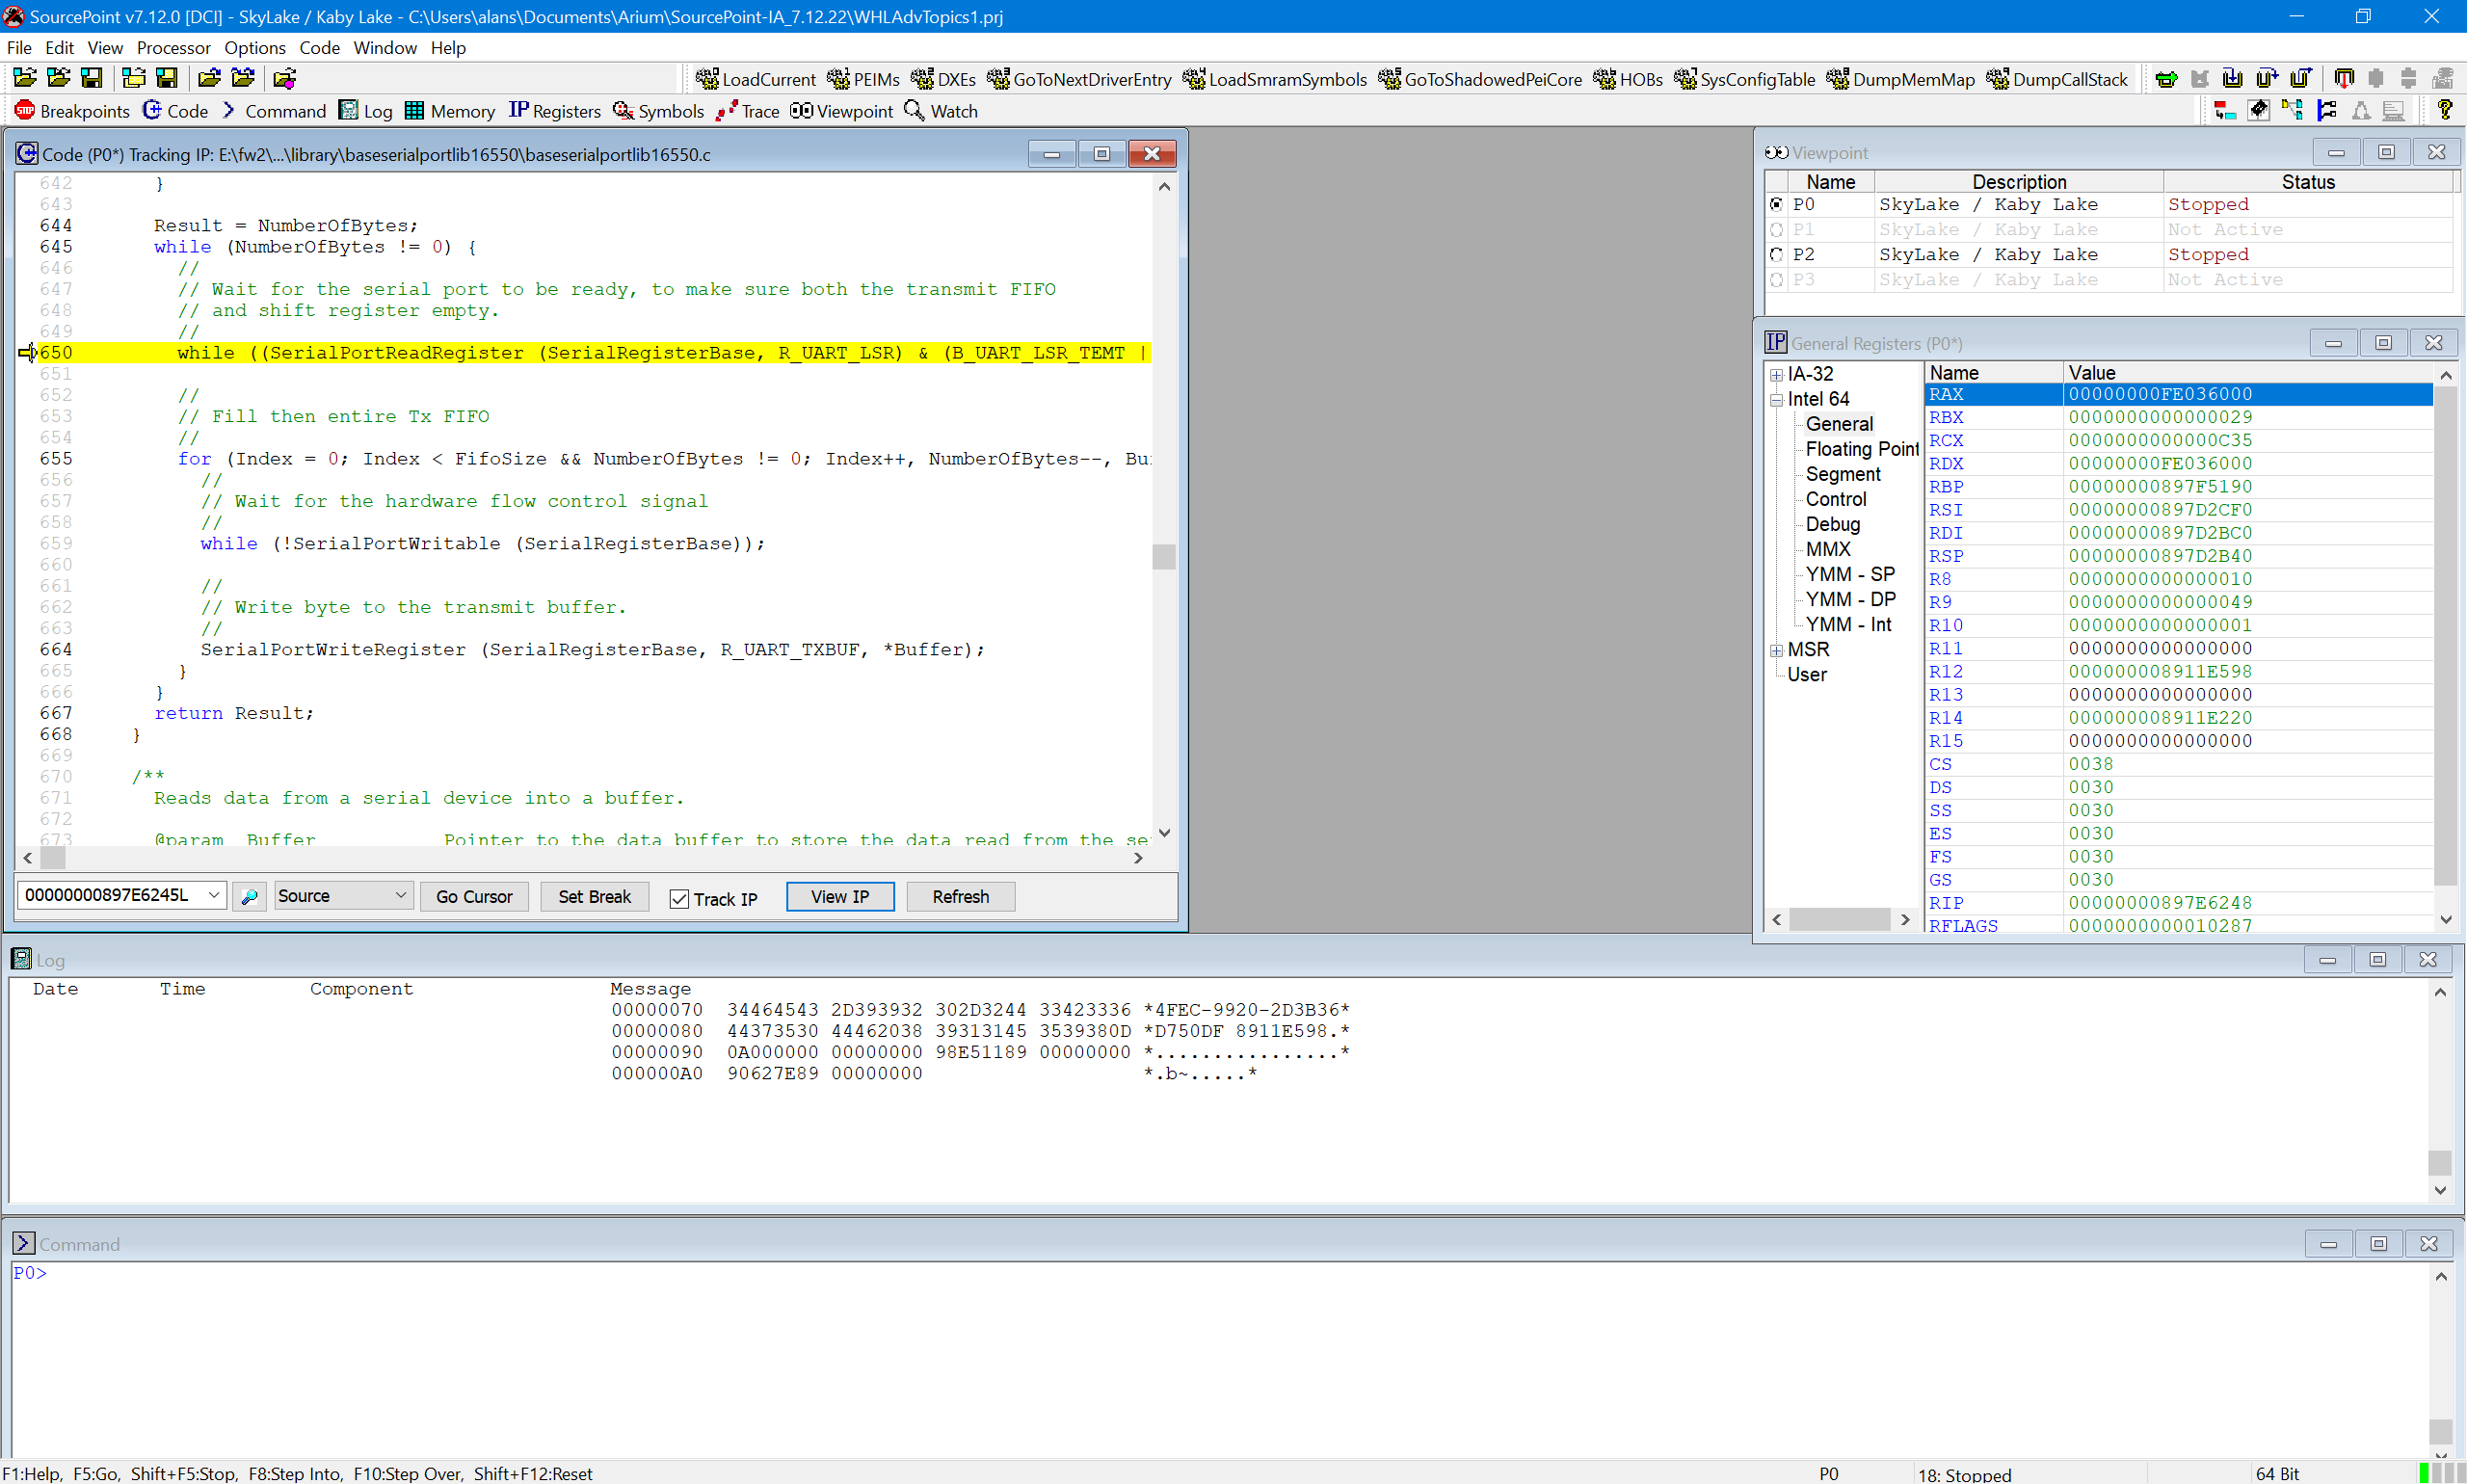
The Command window, at the bottom, presents the command line interface (CLI) from which the command language is used. Many of the standard commands that you would invoke via menu items, associated dialog boxes, hotkeys or buttons on the icon toolbar are available here. Just as some simple examples, useful commands like Go, Stop, Step, etc. are available via the command language.
But, of course, it gets better. Many of the things that you wish that you could do to “enhance” these built-in button or hotkey commands are available via the CLI. Let’s look at a simple example like the “Go” command to illustrate some of the things that can be done. Here’s a sample of the online Help page for Go:
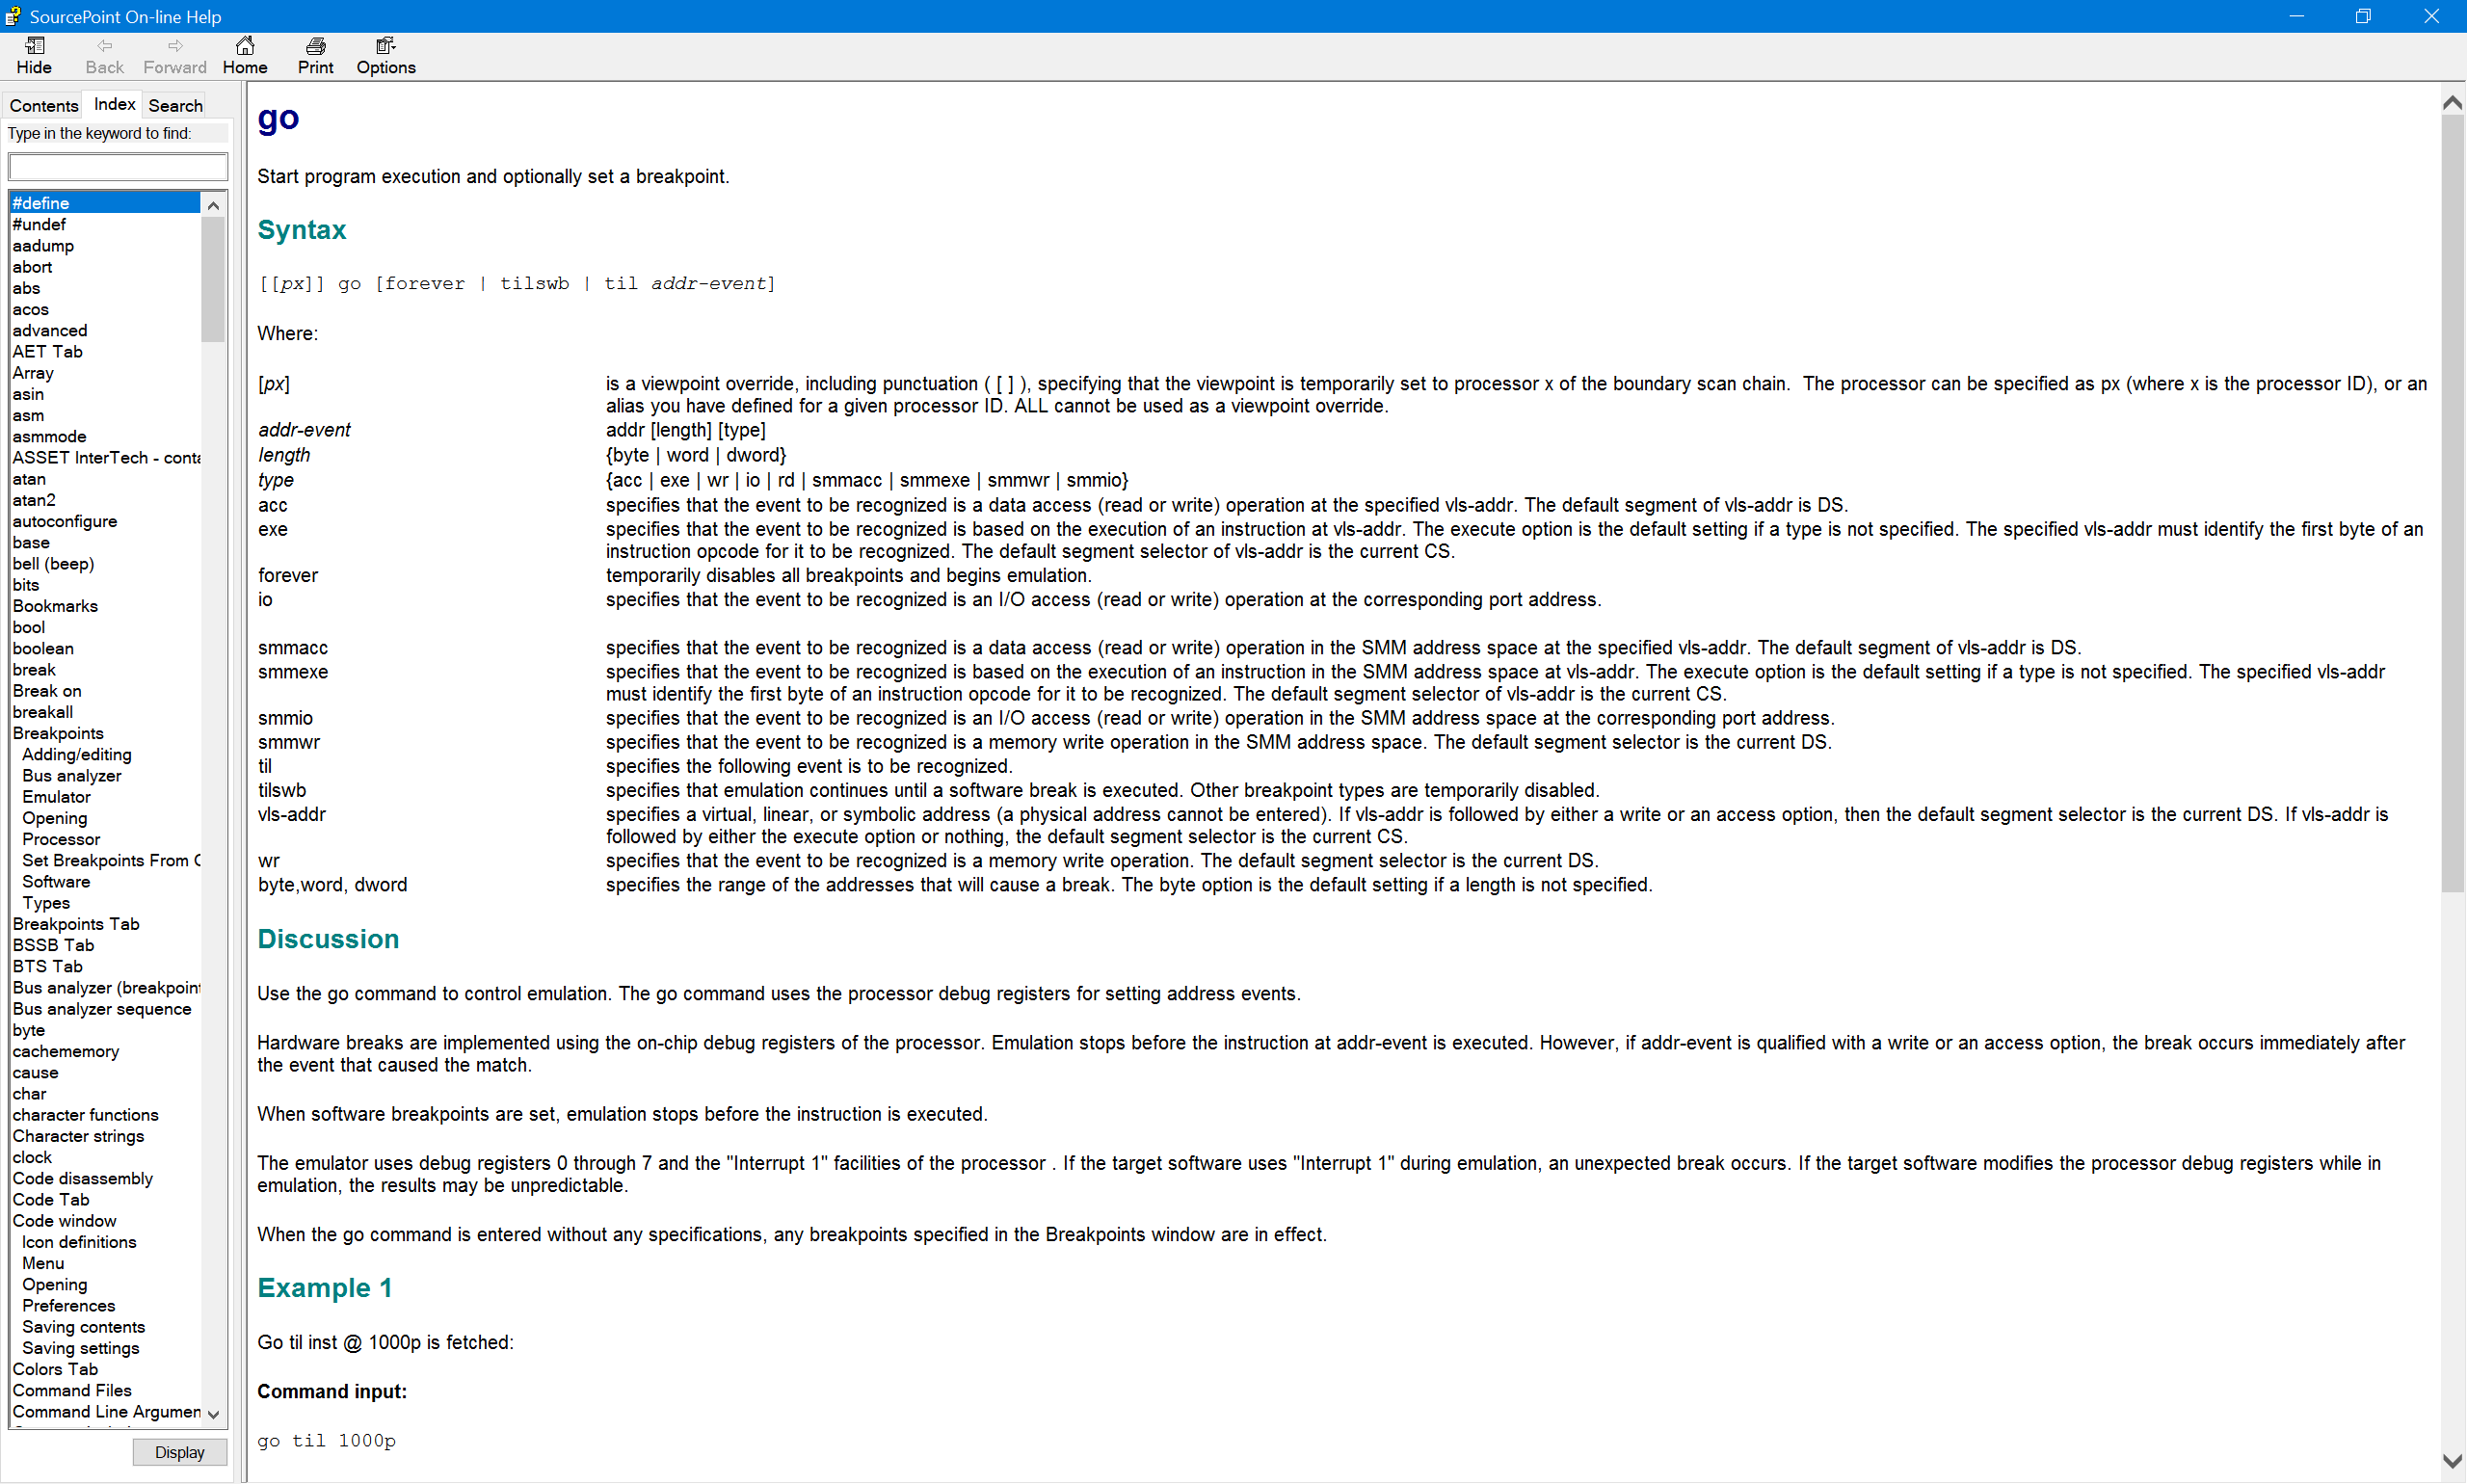
The full Help for “Go” runs over two full pages long. There are numerous examples provided for each command to illustrate its use. As one example, note the “til” parameter; this provides the ability to combine the Go command with, for example, a particular event like a breakpoint. The first example shows how you can run the target until the instruction at address x’1000P is fetched:
go til 1000p
An even more interesting example of the use of the “til” argument is to run until an I/O operation (read or write) at a particular port address. For example, run until an IN or OUT to Port 80:
go til 80io
And on the command line, you can chain together multiple commands, separated by a semicolon (;). For example, if you wanted to run to the next Port 80 read/write, and then display the contents of the AX register (note that AX is the source operand of the IN and OUT x86 instructions, and thus designates the value to be read/written), you would issue the following:
go til 80io; wait; ax
And you’ll see something like the following:
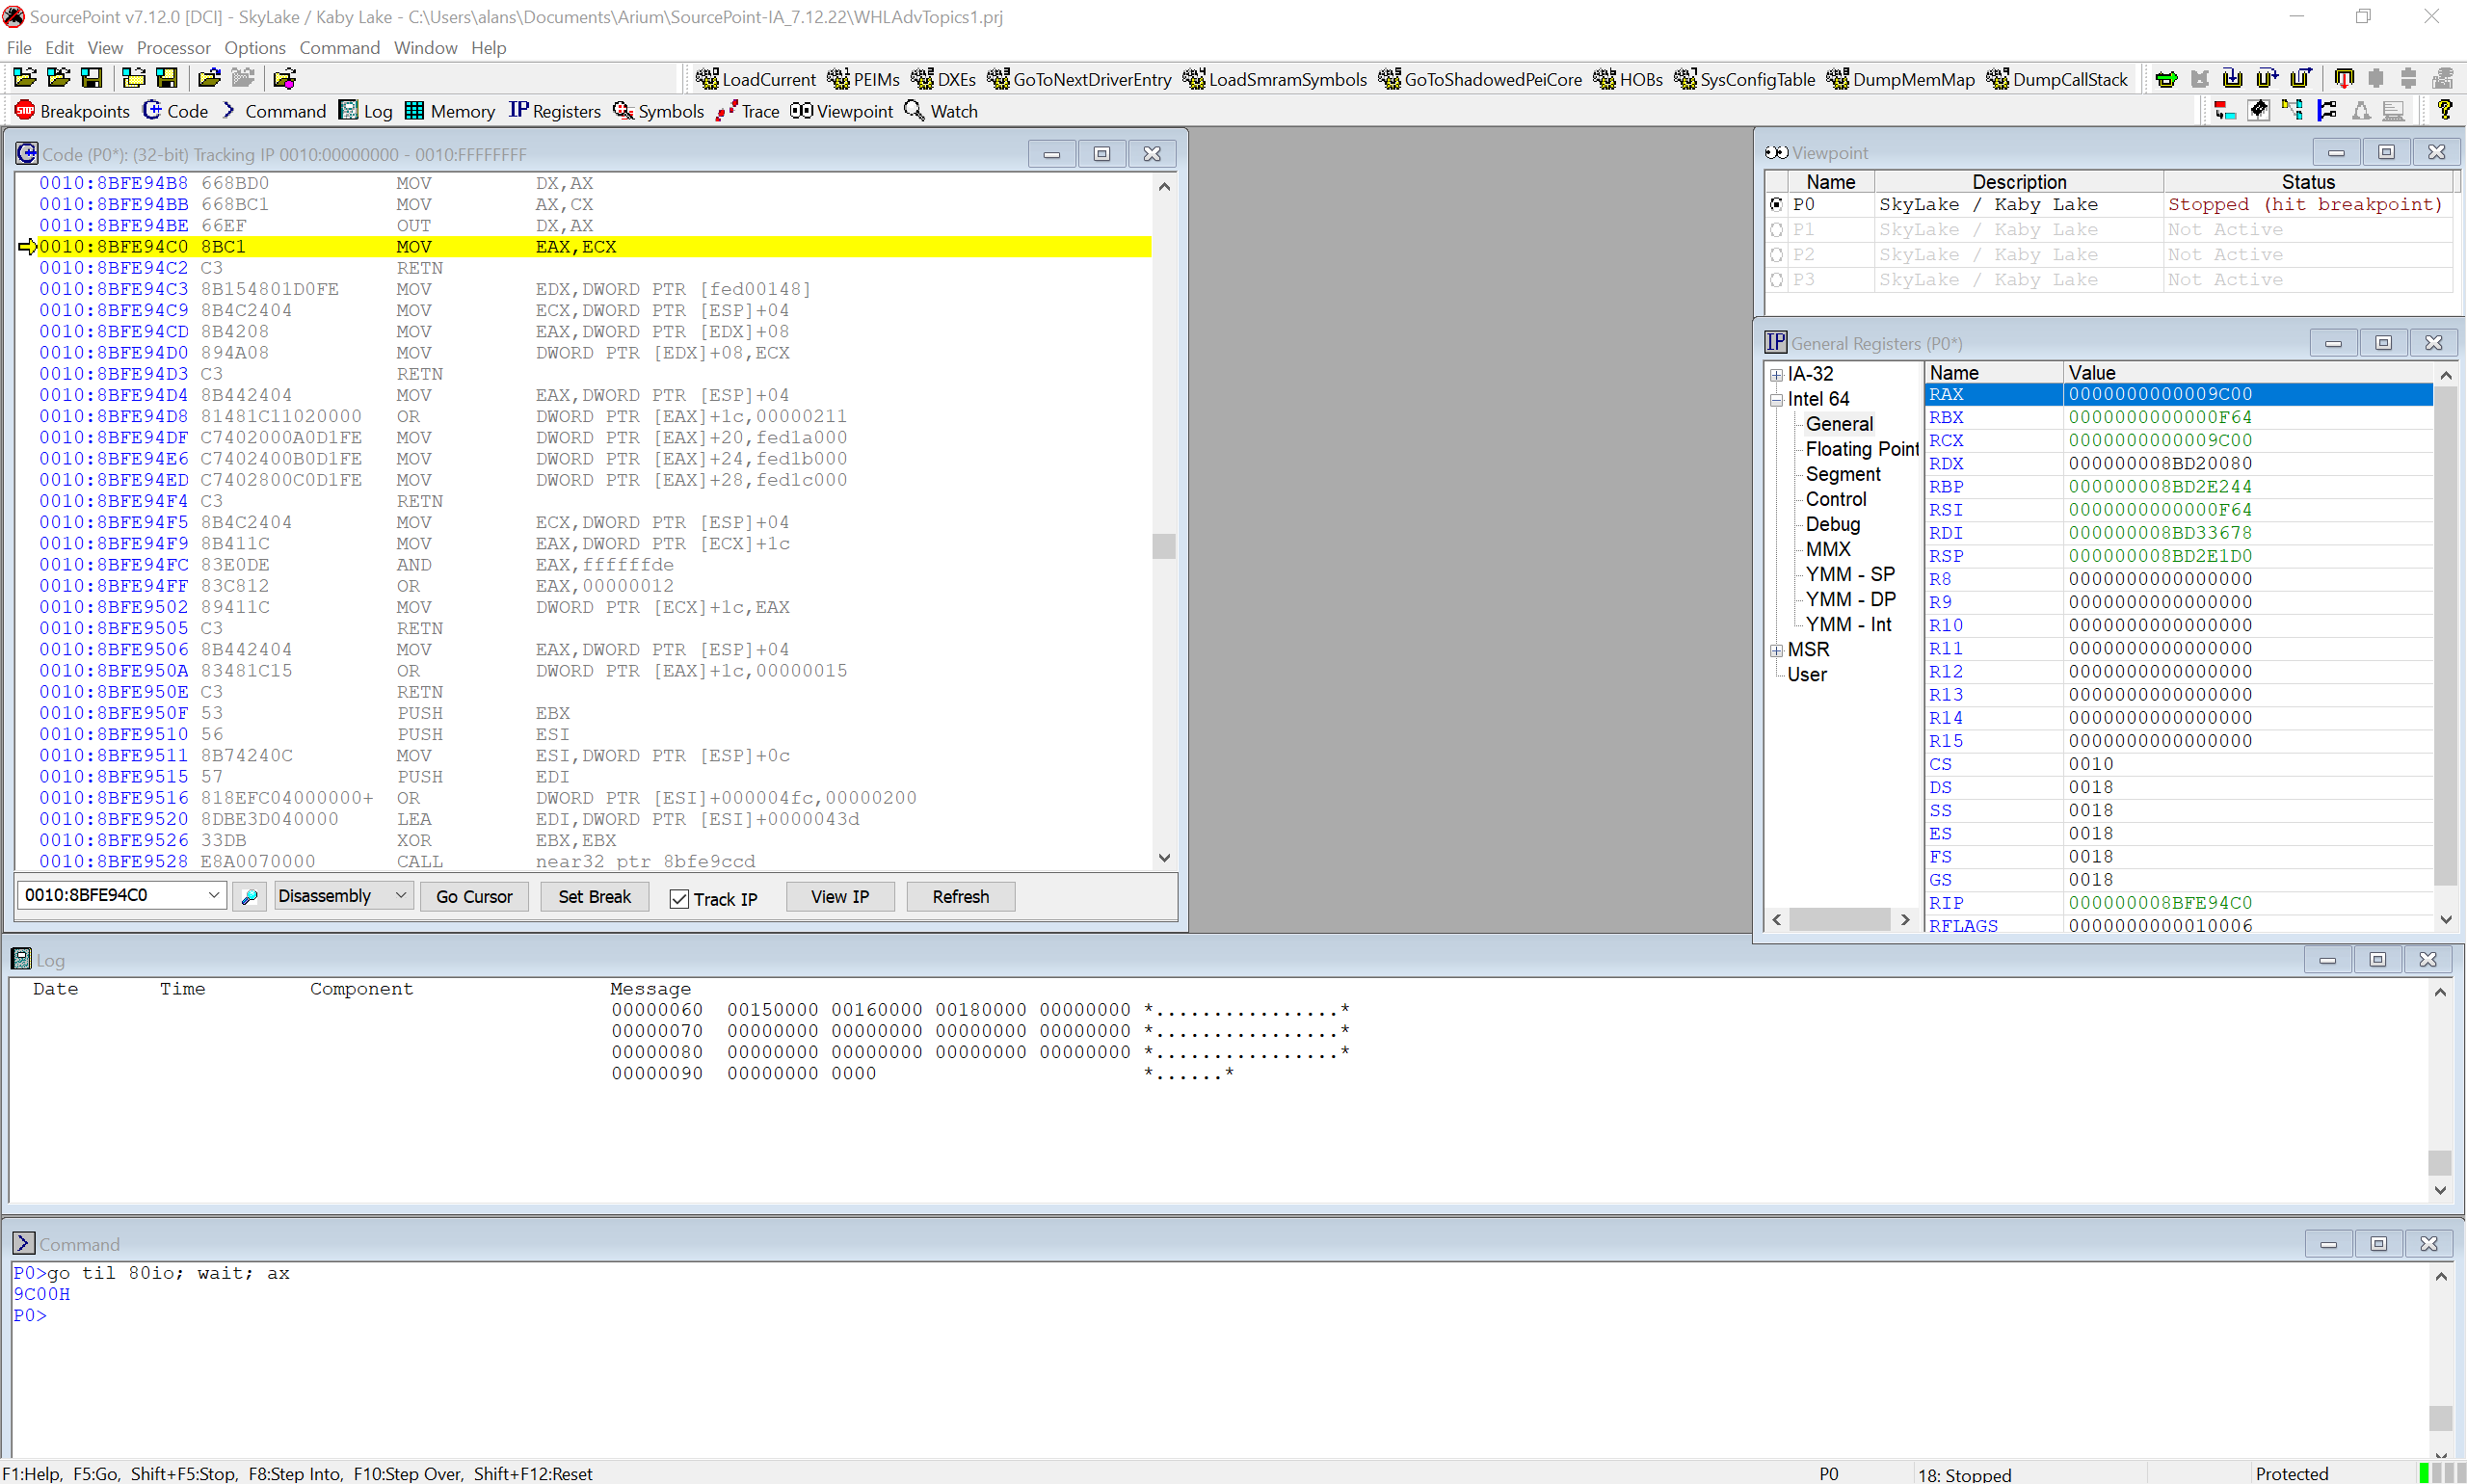
Looking in the Command window above, you see the command string, and the output of the AX register being x’9C00’. You can also see the value of AX in the General Registers window at the right.
Now here’s where it gets really interesting. The command language isn’t simply a bunch of commands that can issue individually or chained together. Rather, it’s a full language, with conditional logic, branching, constants, typed data, looping, operators, debug variables, functions, control variables, etc. etc. etc. Here’s a single command typed in on the Command line that breaks at every Port 80 read/write, and then continues until it encounters a POST code of x’9B47’:
while(ax != 0x9B47) {go til 80io; wait; ax}
Of course, typing in multiple chained commands is great for a quick and dirty effort, but you really want to put more complex tasks into a macro file. Below is a macro file (named GoToPost.mac, or whatever you please) that takes a specific post code of interest as a parameter, and runs until the post code is hit:
define proc RunToPostCode(val)

define ord2 val

{

     dbgbreak = e, I/O access, n=POST80, l=0x80, s=word;

     do {

           go;

           wait;

           printf(“ax = %04x\n”, ax);

     } while(ax != val)

     dbgremove;

}
Looks a lot like ‘C’, doesn’t it? The operation of this little macro should be pretty intuitive. To load it in, go to the File > Macro… > Load Macro… selection, and then pick this GoToPost.mac file. This will load the macro into memory, and make the RunToPostCode procedure available via the command line. Then, run the macro via the command line, for instance, like this:
RunToPostCode(9B47)
The resulting screen looks like this:
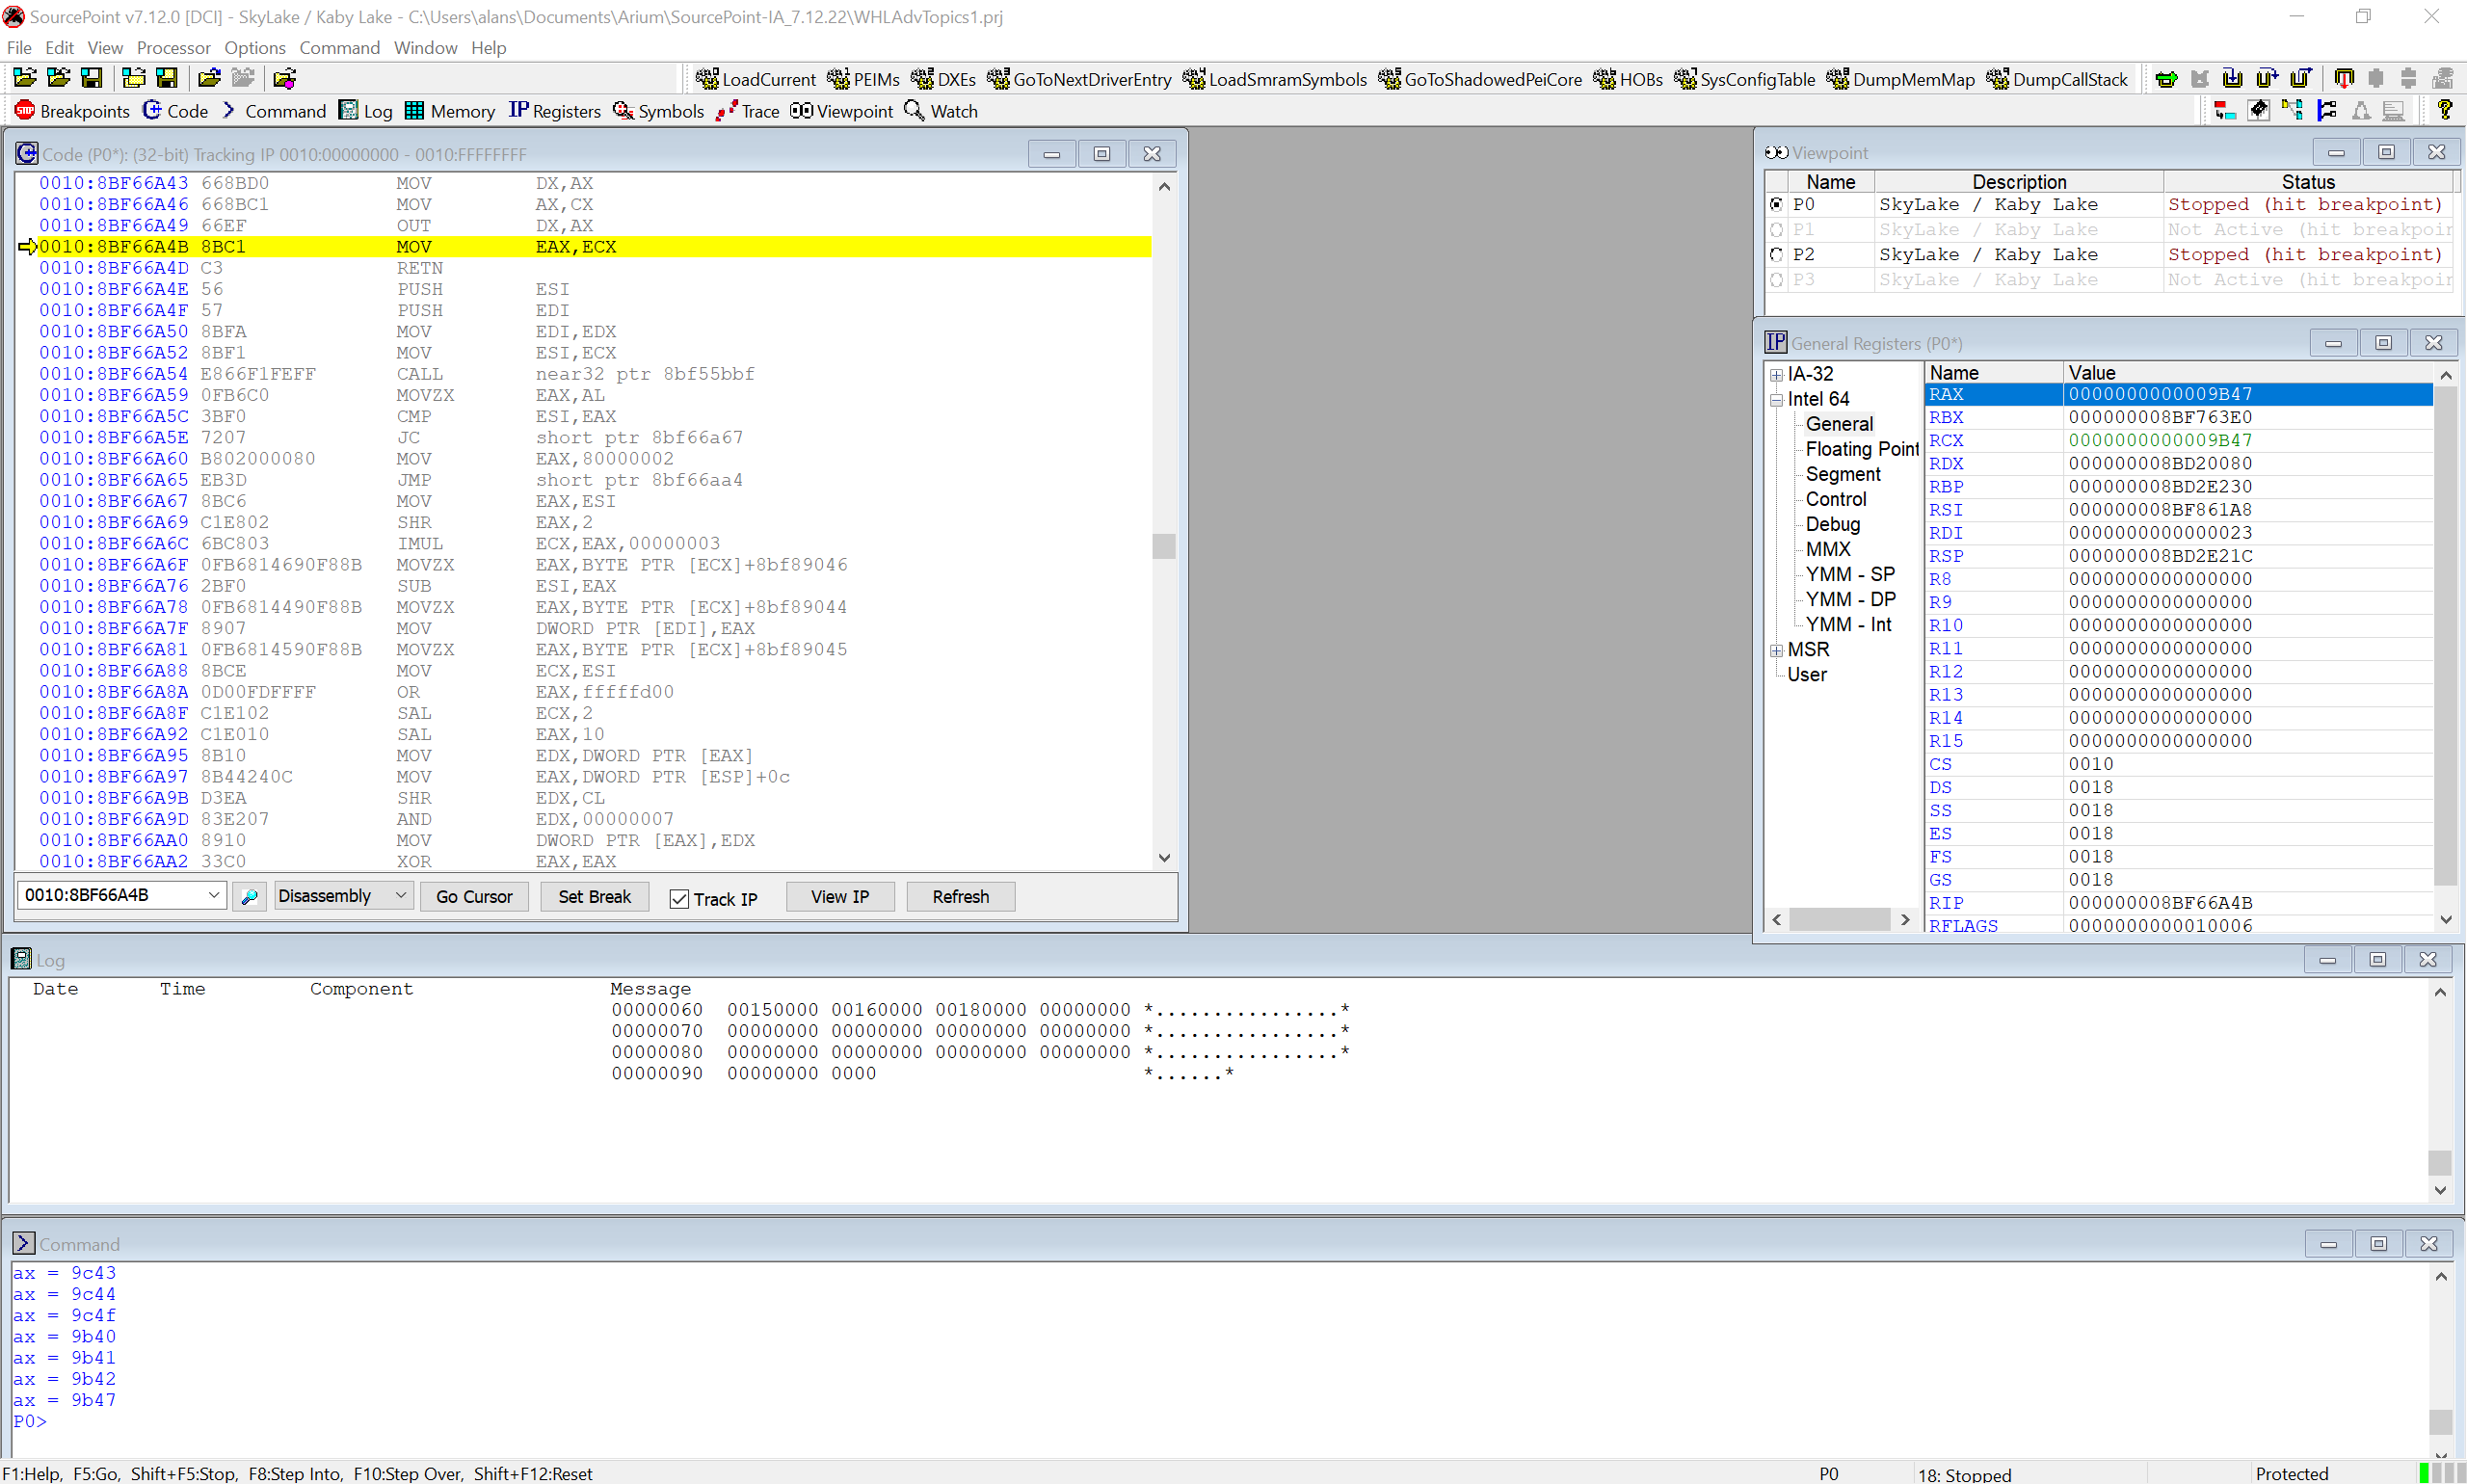
Check out the Command window, where you can see the macro exit once we have AX at a value of 9B47. The same thing of course applies to the value of AX in the General Registers window. Pretty cool, huh?
Below are some additional notes that should help describe the operation of this example macro.
Once you finish typing the macro in, you can load the macro into memory via the command line itself as opposed to the menu, by for example typing:
include GoToPost.mac
Similarly, it will load the macro into memory, making the RunToPostCode procedure available.
SourcePoint has numerous data types like the “ord2” used to define val and postdata. Here’s the list:
| ord1 (byte) | unsigned 8-bit quantity (byte is an alias) |
| ord2 (word) | unsigned 16-bit quantity (word is an alias) |
| ord4 (uint, dword, offset) | unsigned 32-bit quantity (uint, dword and offset are aliases) |
| ord8 (qword) | unsigned 64-bit quantity (qword is an alias) |
| ord12 | unsigned 96-bit quantity (supported but ord16 is used) |
| ord16 | unsigned 128-bit quantity (Not available for memory access) |
| char | ASCII character |
| nstring (string) | a string object (similar to CString) |
| int1 | signed 8-bit quantity |
| int2 | signed 16-bit quantity |
| int4 (int) | signed 32-bit quantity (int is an alias) |
| int8 | signed 64-bit quantity |
| int16 | signed 128-bit quantity (not available for memory access) |
| real4 (float) | signed 32-bit floating point value (float is an alias) |
| real8 (double) | signed 64-bit floating point value (double is an alias) |
| real10 | supported, but real8 is used |
| pointer | represents an address in target memory |
| boolean (bool) | true (non-zero value) or false (zero value) |
| Array | Array of elements of any valid debug data type with the exception of pointers. (Not available for memory access.) |
The dbgbreak command sets and displays debug register (hardware) breakpoints. dbgbreak with no arguments displays a list of the current debug register breaks. In the command listed above, “e” enables the specified breakpoint, “I/O access” is the breakpoint type, “POST80” is what we’ve named this breakpoint, we’re breaking on Port 80, and breaking on a word (16-bit) length – which of course is of type ord2.
By default, SourcePoint expects macros to be stored in the “defaultpath” directory; which in many cases is Documents\Arium\SourcePoint-IA_7.12.xx\. If you would for example like to store yours in the Macros folder, and then use the include command to load it, you can modify the defaultpath through the following commands:
define nstring strpath = defaultpath

defaultpath = strpath + “\\Macros”
One last thing: the command language is completely described within the SourcePoint Users Manual, and comprises almost 400 pages of material. You can find the complete set of help on SourcePoint and its command language in four locations:
- The SourcePoint Users Manual PDF: stored within the installation directory.
- The Online Help files accessible via the SourcePoint application’s Help menu.
- The above PDF is also available within the SourcePoint Academy page: https://www.asset-intertech.com/resources/academy/sourcepoint-academy/.
- An online Help facility, that is really well-suited to online browsing on computers and on mobile, is also available via the SourcePoint Academy: https://www.asset-intertech.com/resources/academy/sourcepoint-academy/.