In Episode 10 of the Minnowboard Chronicles, I created my first UEFI Shell script. Today, I “up my game” by writing an actual application in ‘C’.
In Episode 10, I created a simple “Hello World” program that ran as a UEFI shell script. This is akin to writing a Basic program for beginning programmers. It was simple enough to create a short text file (with suffix .nsh) within the built-in UEFI shell editor, and then just run it from the command line. It’s analogous to Basic because the program just executes in an “interpreted” form, with no previous steps of compiling, linking, etc. So, it was very simple to get up and running.
With such simplicity, however, comes compromises. The UEFI shell scripting language is somewhat constrained; although it does have support for looping, conditional logic, and such, the language is unfamiliar, and creating a large application within it would be difficult. This is as intended: the Shell is simple and useful and lightweight, and the list of commands available to scripts using it is fairly limited.
Writing a full-fledged application or driver that executes directly within the UEFI environment is a much larger challenge, but even more rewarding. These can be written in ‘C’, so the power of that language is at your fingertips. And they can access services provided both by the UEFI and the shell, so they can do so much more.
I decided to start with the familiar “Hello World” program, written in ‘C’, as below:
#include <Uefi.h>
#include <Library/UefiApplicationEntryPoint.h>
#include <Library/UefiLib.h>
EFI_STATUS
EFIAPI
UefiMain (
IN EFI_HANDLE ImageHandle,
IN EFI_SYSTEM_TABLE *SystemTable
)
{
Print(L"Hello World \n");
return EFI_SUCCESS;
}
I will describe the process in more detail in an upcoming blog, but here’s an outline of the steps needed to create this simple Hello World application:
- Have the EDK II source build tree and tools available on your PC.
- Run the edksetup script.
- Create a new directory in your workspace and put the ‘C’ source file and its corresponding .inf file there.
- Update an existing .dsc file and add in support for your MyHelloWorld .inf file. Specifically, right at the end of the [Components] section and right before the [BuildOptions] section, add in this line:
MyHelloWorld/MyHelloWorld.inf
For reference, the .inf file looks like the below:
## @file
# Brief Description of UEFI MyHelloWorld
#
##
[Defines]
INF_VERSION = 0x00010005
BASE_NAME = MyHelloWorld
FILE_GUID = 6467c5d1-d0f0-4b47-a6a4-0545624972ef
MODULE_TYPE = UEFI_APPLICATION
VERSION_STRING = 1.0
ENTRY_POINT = UefiMain
#
# The following information is for reference only and not required by the build.
#
VALID_ARCHITECTURES = X64
#
[Sources]
MyHelloWorld.c
[Packages]
MdePkg/MdePkg.dec
[LibraryClasses]
UefiApplicationEntryPoint
UefiLib
[Guids]
[Ppis]
[Protocols]
[FeaturePcd]
[Pcd]
Put these three files in the same directory, launch the Developer Command Prompt for VS2013, and type in:
Build –p MyHelloWorld/DuetPkgX64.dsc
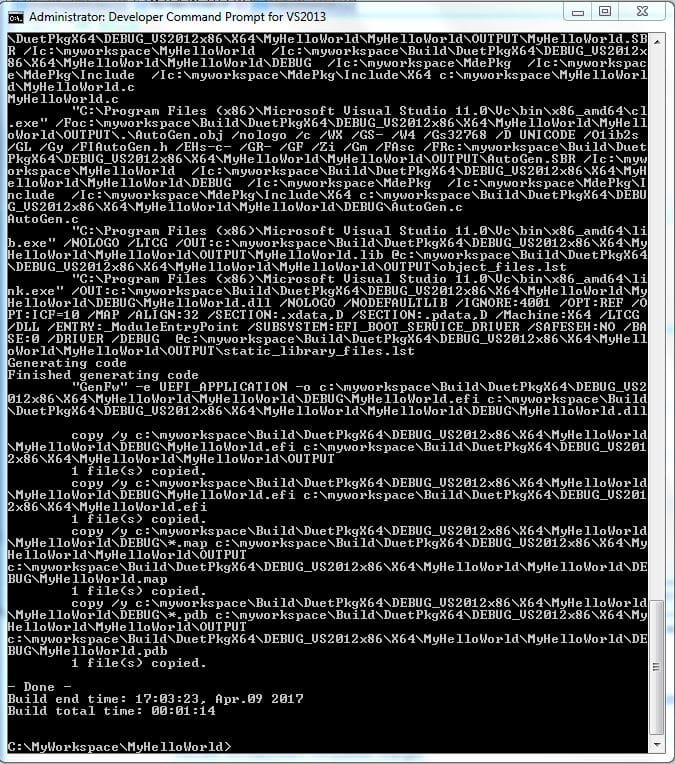
It runs for a minute, but I got a lot of joy out of seeing (after numerous failures due to my own ineptitude) a successful compile:
After that, it was a simple matter of copying the MyHelloWorld.efi file over to a USB stick, launching the UEFI shell, and typing in MyHelloWorld at the UEFI shell prompt. I always get a kick out of seeing “Hello World!” show up on a screen.
Next week, I’ll see what I can do to develop a more sophisticated application, and explore what debugging tools are available for UEFI applications. In the meantime, to pay the bills, I’ll direct you to more fascinating UEFI material, in particular our eBook on UEFI Framework Debugging (note: requires registration).


