As you may have seen from my last blog, my old favorite open-source platform, the MinnowBoard, has been declared End-of-Life. So how am I to satisfy my innate need to explore the low-level interfaces between silicon, hardware and firmware? I may have found a new open source firmware board that meets my needs.
At the end of The MinnowBoard Chronicles Episode 46: Using the DediProg SF100, I declared that there may not be an Episode 47 of this long-running Chronicles; the MinnowBoard Turbot is now EOL. You can still buy some of the remaining inventory of the board itself from Mouser, Arrow and maybe others, but the “Lures” that go with them are pretty much defunct. In fact, the JTAG Debugger Lure from Tin Can Tools, that provides an XDP interface for use by debuggers such as SourcePoint, can no longer be purchased from anywhere, as far as I can tell.
So, what was I going to do for my open source explorations? I could keep using the MinnowBoard, but writing about it now is a bit of a waste of time: anyone reading the Chronicles wouldn’t be able to replicate what I was doing, so the value of the content goes way down. And I am passionate about open source as a framework for our community working together to benefit each other, which doesn’t really apply to a defunct board. Also, it would be nice to work on a more modern platform, with more current silicon, that has some of the cool new debug features like Intel Processor Trace and Architectural Event Trace.
So, at the exhortations of a good friend, I went to the Intel open source firmware site. As it turns out, there are two open-source UEFI platforms supported: one is the MinnowBoard (of course) based upon the circa 2013 Bay Trail CPU, and the other is for the newer circa 2016 Apollo Lake CPU (or, more correctly, the Intel Atom Processor E3900 Series Processor). The Apollo Lake firmware link is at UEFI Firmware Project for Intel Atom Processor E3900 Series Processor Platforms. There are two platforms supported: the Intel “Leaf Hill” Customer Reference Board (which I presume is difficult to get a hold of, because you have to fetch it directly from Intel), and the AAEON Up Squared board (which anyone can purchase online).
It was at the beginning of these explorations that I recalled a presentation I sat through at the Open Source Firmware Conference (OSFC) last year. Debugging Intel Firmware using DCI & USB 3.0 was an excellent session hosted by Maggie Jauregui of Intel and Mickey Shkatov of Eclypsium, that went over the use of JTAG to debug firmware on the UP Squared board. The presentation is available from the above link, and the YouTube video is here if you want to watch the whole presentation.
In the session, they recommended the UP Squared with the Intel Celeron N3350 Series processor. BUT LET THE BUYER BEWARE: it’s a little confusing, but you should purchase the board with the code UPS-APLX7-A20-0864. As long as it’s an Intel E3900 CPU, you should be good. Don’t buy a Celeron 3350, as this is an Apollo Lake N3350 and I can’t warrant it’ll work with the open source firmware for the E3900 that Intel has released above. I’d also recommend getting the 8GBM RAM and 64GB eMMC configuration, because at some point I’ll want to run Windows 10 on this as I explore climbing the stack from firmware to the Windows kernel.
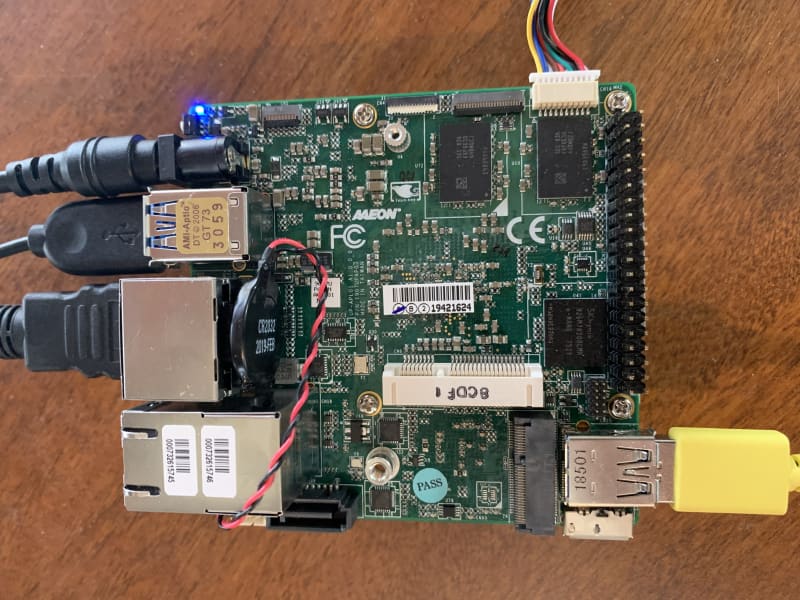
Less than a week after I ordered it (which is pretty good considering that this blog is being written during an extended period of social distancing), the board arrived, and I had it in my hands:
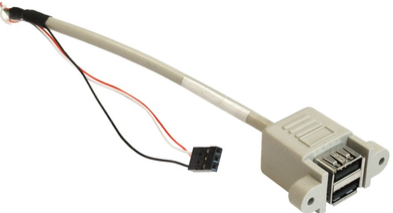
I also purchased the serial cable EP-CBUSB10PFL01 from https://up-shop.org/usb-2-0-pin-header-cable.html, because I’ll want to use PuTTY to watch the debug console output:
Instructions on how connect this cable up to a standard USB/FTDI cable are here: https://wiki.up-community.org/Serial_console. Note, you can connect the red, white and black wires (UART0_RXD, UART0_TXD and GND) on the serial cable to their peers on your stock USB/FTDI cable with some jumper wires; the two USB jacks seen above aren’t used here.
The board is not cheap, and it’s not truly open like the MinnowBoard was (i.e. there are no schematics available), but at least you can follow the build instructions to build a debug image from scratch, complete with source and symbols for consumption by a JTAG debugger. And, the coolest thing is that Intel Direct Connect Interface (DCI) works on this platform, once you flash an image from the Intel firmware site.
What is Intel DCI? I could write pages and pages on it here, but that would take too much time. Suffice to say that it’s a way to JTAG-debug an Intel CPU over a USB port, without the need for an external hardware pod. You can read more about it in the publication above by Maggie and Mickey, and there are numerous articles published on it. Most public platforms have the technology “locked down” because of security concerns. But, as an open-source means to learn about JTAG and firmware debug, and as an extremely powerful debug facility that can be used where physical XDP access is precluded, it is wonderful. Intel did a very good job.
The trick here is that, when you receive your UP Squared board, it “says” that it is enabled, but it really isn’t. I went into the BIOS menu and checked the “DCI Enable (HDCIEN)” setting, and it says Enabled, but I could not connect with SourcePoint. There are a lot of breadcrumbs that you can use to determine whether you have a valid connection or not, but the “smoking gun” was the trail left behind by the BIOS history of the UP Squared board that you can read here: https://wiki.up-community.org/UP_Squared_BIOS_History. The BIOS my board came equipped with was UPA1AM40. But, when you read the History, you see that DCI was enabled in UPA1AM31.bin, and then in UPA1AM37 it says “Remove Intel ISS Debug/Trace Support for Formal Release Version”. It seems that they removed support for DCI, but kept the menu intact! Just laziness, I presume. And you can no longer get any of the AAEON Up Squared releases between 3.1 and 3.7, that might have the DCI support enabled within them.
And a couple of really important notes here for folks who may be following in my footsteps:
- On https://downloads.up-community.org, you can fetch BIOS versions 5.0, 4.0, 2.1 and 1.8. But none of these have DCI support. AND, the instructions for installing the new image with the GO shell script are just plain wrong, I have been told (but not verified). Apparently, these images are proprietary, and the GO.nsh won’t re-flash the board. You have to use a DediProg for this (more on this later).
- There are more erroneous directions on how to flash the board at https://wiki.up-community.org/Bios_Update. But, a very interesting Easter Egg is near the bottom of the page: in order to see the more advanced BIOS menu entries, like for DCI, you must put in the password “upassw0rd” into the AAEON images when you boot. Not that the DCI entry works, though, anyway.
So, if you want to get DCI to work, you have to fetch an image from the UEFI Firmware Project for Intel Atom Processor E3900 Series Processor Platforms, or roll your own per the build instructions. And then, you need to flash it with a DediProg or similar SPI flash programmer.
Since I wanted to debug with source and symbols with SourcePoint, I followed the build instructions. That was a journey by itself, and I’ll write an article separately on that later. And then once I had the debug image built, I fired up my DediProg.
Again, for those following in my footsteps, here’s how I did it.
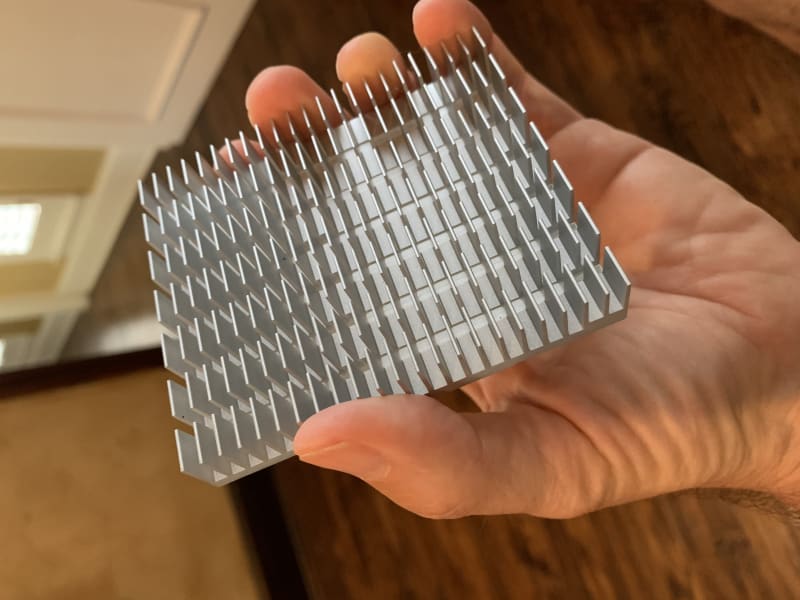
There are some excellent instructions available at https://wiki.up-community.org/BIOS_chip_flashing_on_UP_Squared. But, it recommends a custom cable to connect the SF100 to the UP Squared CN22 (should be CN15) SPI header. Being lazy, I decided to just purchase an SOIC8 test clip and attach it to the SPI flash itself. First you have to remove the heat sink:
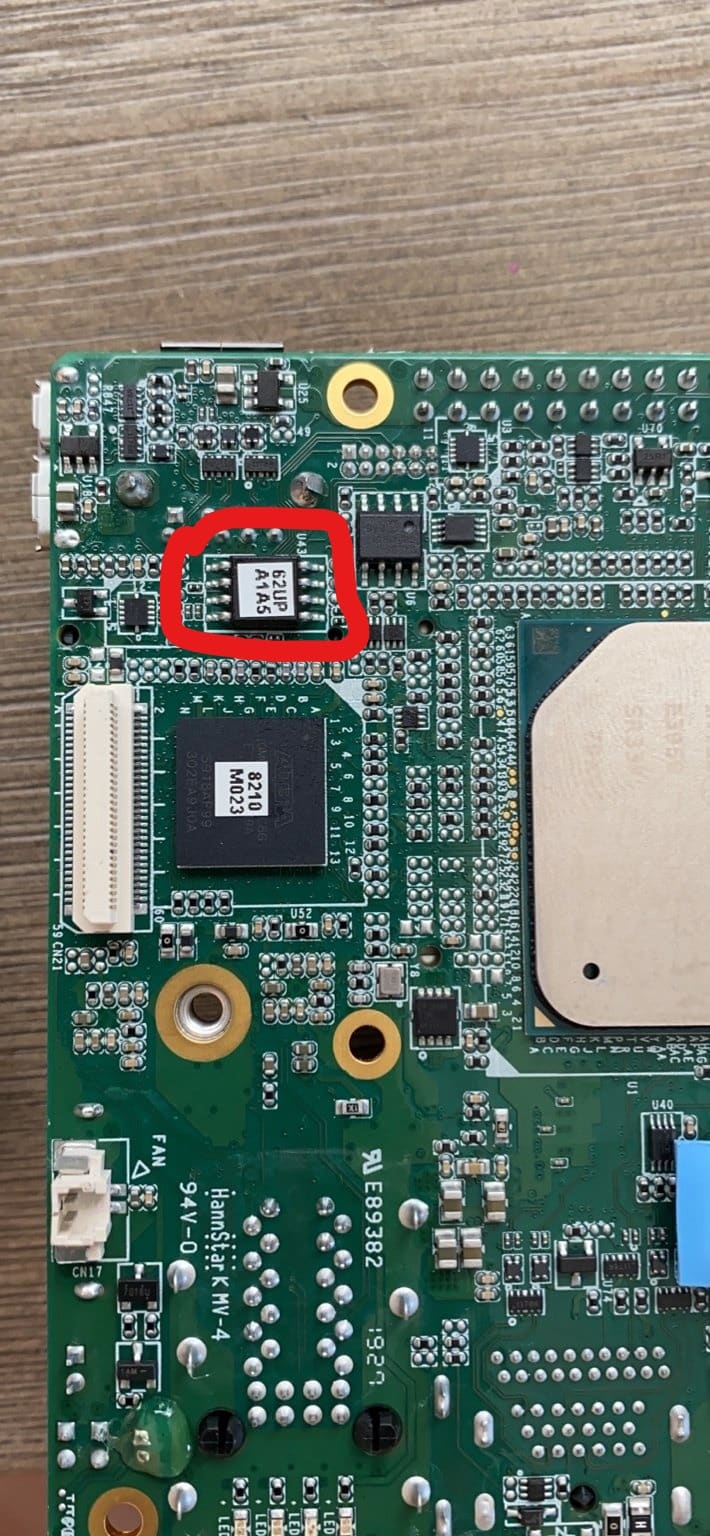
And then you can see the SPI flash, circled in red:
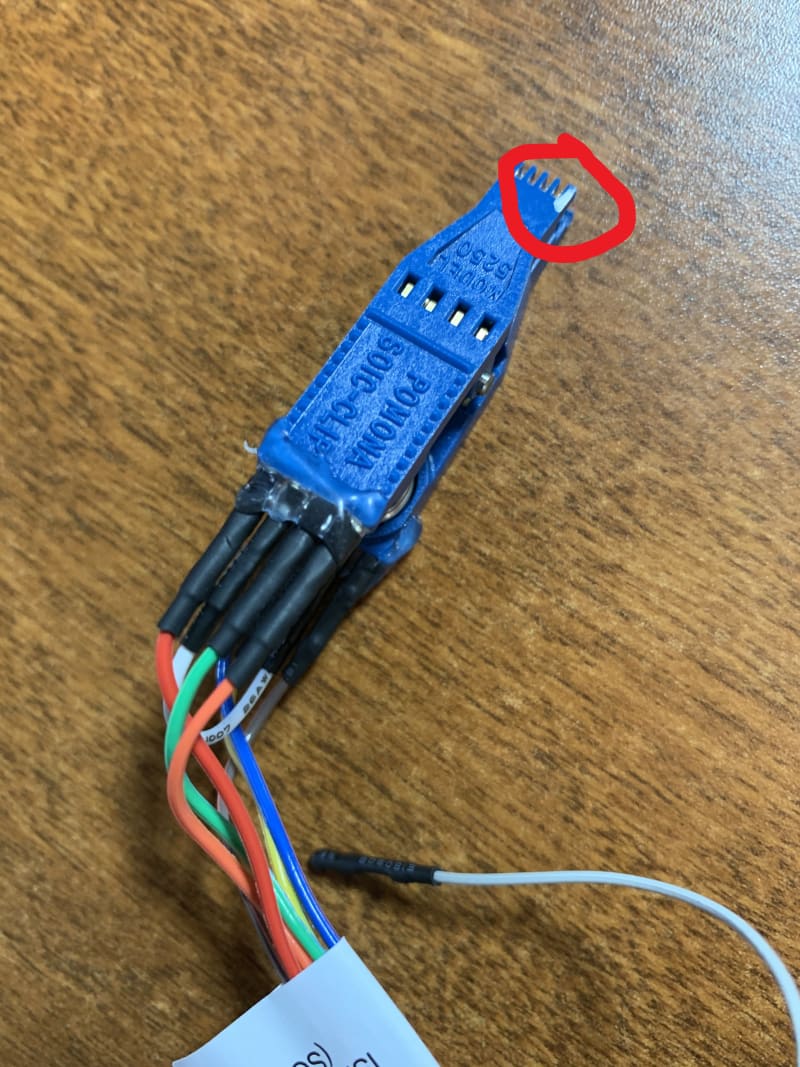
If you look carefully under a magnifying glass at the SPI flash device, you can see a dot in the upper right corner. This is the Pin 1, the /CS signal, which has to connect to the part of the clip that has the white mark:
I carefully attached the SOIC8 test clip with the right orientation, and then plugged the SF100 USB cable into my PC, and fired up the DediProg Engineering software. Then I basically followed similar steps to that I wrote up in The MinnowBoard Chronicles Episode 46: Using the DediProg SF100.
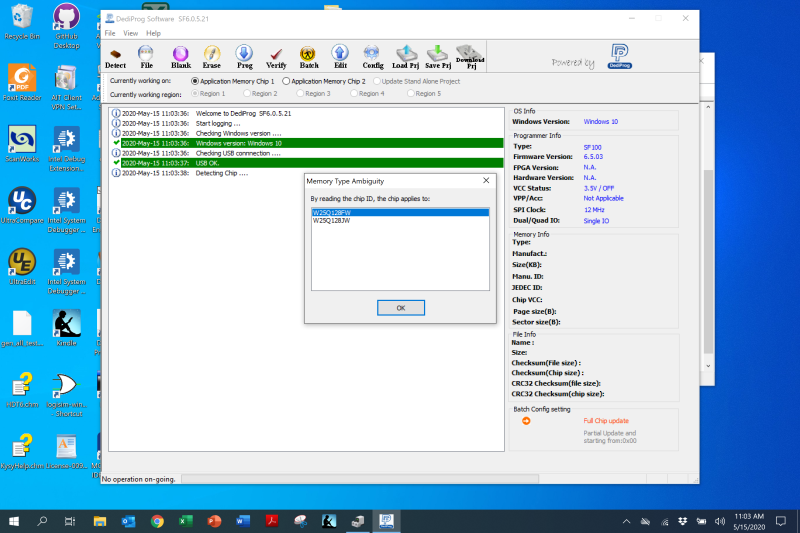
First we detect the chip:
In this case, it’s the W25Q128FW.
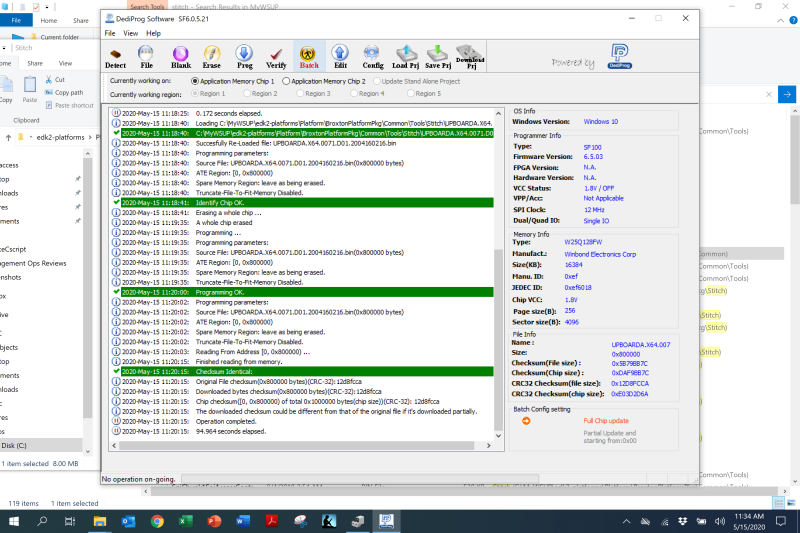
Then we program the UP Squared with the UPBOARDA.X64.0071.D01.2004160216.bin that we created when we built the image, it’s in the C:\MyWSUP\edk2-platforms\Platform\BroxtonPlatformPkg\Common\Tools\Stitch folder:
Then I hooked the special USB3 DCI cable to my PC. NOTE: do not use a normal USB cable! You have to buy the yellow ones with the VBus snipped, the Intel SVT DCI DbC2/3 A-to-A Debug Cable 1 Meter, part # ITPDCIAMAM1M, from Intel DesignInTools, Mouser, or others. They’re only $10 or $12 USD, so pretty cheap.
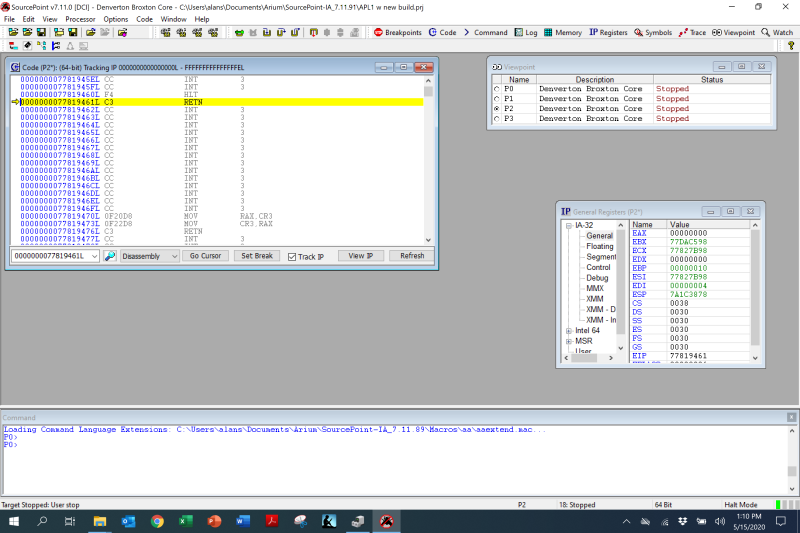
Then I powered on the board, launched SourcePoint, and eureka:
Run-control works! The above shows the standard code segment where the board is just sitting in the UEFI shell.
If you get this far, you can do some wonderful things with debug and trace on this board. And you don’t need to have a hardware probe worth hundreds or even thousands of dollars to do it – you just need a software license. The MinnowBoard was always a little bit flaky and underpowered for what I wanted to do; now with the UP Squared, I can debug at a low level the Windows 10 kernel, hypervisor and virtual machine technologies, and other things that I’ve always been interested in. All with hopefully reasonable performance, much faster than the MinnowBoard. Stay tuned and we’ll see!


